
🌿 ROSEMARY THYME SLOW COOKER TURKEY GRAVY

#WalmartPartner — As a Walmart Creator, I may earn a commission from qualifying purchases made through my Walmart links.

🌿🦃 A Little Homemade Gravy for the Thanksgiving Table

There is something so comforting about a warm pitcher of homemade gravy on the table at Thanksgiving. And when you make my slow cooker boneless turkey breast, you already have the beginning of a delicious gravy waiting for you!

The unsalted chicken broth takes on the flavors of the turkey, rosemary, and thyme as everything cooks together. With just a little cornstarch, you can turn those flavorful juices into an easy gravy—no butter needed. 💛

────────────────────────

🌿 ROSEMARY THYME SLOW COOKER TURKEY GRAVY

Made with the cooking juices from my Slow Cooker Boneless Turkey Breast

Ingredients

• 2 cups strained cooking liquid from the slow cooker turkey breast
• Additional Swanson Unsalted Chicken Broth, if needed
• 2 tablespoons Great Value Corn Starch
• 2 tablespoons cold water
• Black pepper, to taste
• A little additional rosemary or thyme, if desired

Directions

  1. Once the turkey breast is fully cooked, remove it from the slow cooker and allow it to rest. Check that the thickest part reaches 165°F with a food thermometer.
  2. Carefully pour the cooking liquid through a strainer into a saucepan. Skim off any fat, if desired.
  3. Measure 2 cups of the strained liquid. If you don’t have quite enough, add a little Swanson Unsalted Chicken Broth.
  4. Bring the liquid to a gentle simmer over medium heat.
  5. In a small cup, stir the cornstarch and cold water together until smooth. Slowly whisk the mixture into the simmering liquid.
  6. Continue stirring and simmering for a few minutes, until the gravy thickens. Taste and add black pepper or a little more rosemary or thyme, if desired.
  7. Serve warm over slices of turkey and enjoy! 🦃💛

Helpful Notes

🌿 If the gravy becomes too thick, whisk in a little more broth.

🌿 For a thicker gravy, mix a little additional cornstarch with cold water before adding it to the saucepan.

🌿 Taste before adding salt. Even when using unsalted broth, some turkey breasts contain added sodium.

🌿 Refrigerate leftover gravy within two hours and bring it to a boil when reheating.

A little RosemaryThyme note: I love finding simple ways to use every bit of flavor from a meal. This easy gravy makes our slow cooker turkey breast feel extra special and is just right for a cozy Thanksgiving gathering. 💛

🛒 Browse my Walmart storefront:
https://walmrt.us/4xzgBgU

🏡 Visit RosemaryThyme Home:
https://rosemarythymehome.com

From my table to yours, with love.
Helene 😊
Rosemary Thyme 🌿
Fall in Love with Home Again. 💛🏡
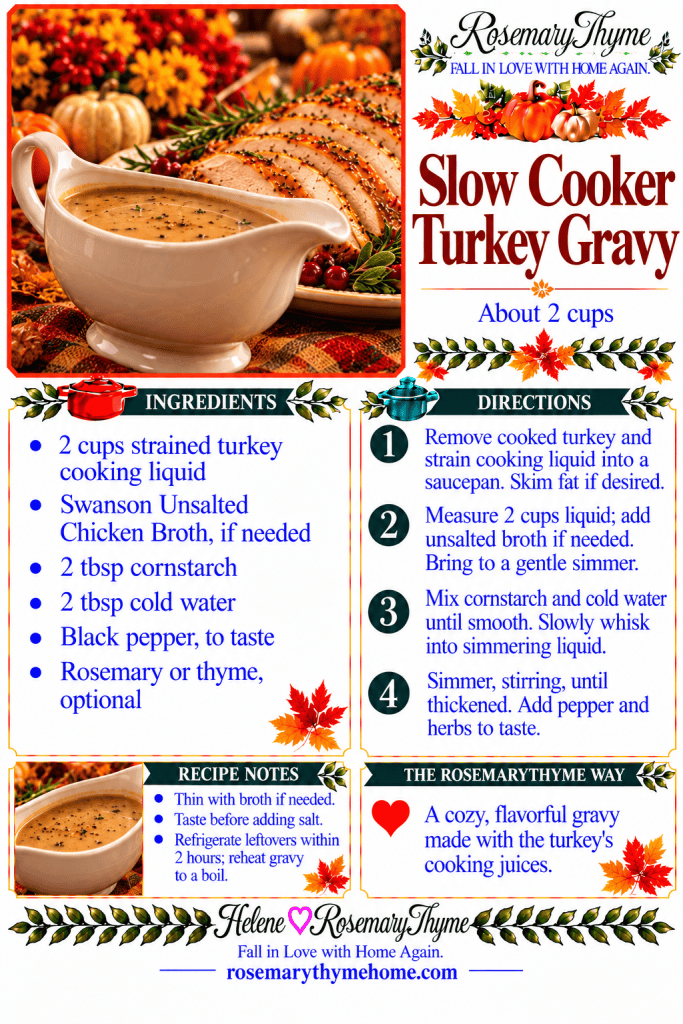
Sweet Potato and Butternut Squash Gratin

#WalmartPartner — As a Walmart Creator, I may earn a commission from qualifying purchases made through my Walmart links.

🌿 RosemaryThyme Butternut Squash & Sweet Potato Gratin

Tender squash and sweet potatoes, fragrant herbs, and a light creamy sauce make a comforting side dish for a fall supper or Thanksgiving table—with no peeling or chopping vegetables!

Makes: 6 side servings
Baking dish: 8-inch square or similar 2-quart dish

Ingredients

• 2 bags (10 ounces each) Great Value Frozen Butternut Squash Cubes
• 2 bags (10 ounces each) Great Value Frozen Diced Sweet Potatoes
• 1 cup fat-free half-and-half
• 1 tablespoon Great Value Cornstarch
• ½ cup shredded Swiss cheese, divided
• 2 tablespoons grated Parmesan cheese
• 1 tablespoon fresh thyme leaves, or 1 teaspoon dried thyme
• ½ teaspoon dried rosemary, finely crushed
• ¼ teaspoon black pepper
• Small pinch of ground nutmeg
• 1–2 garlic cloves, minced, optional
• Olive oil cooking spray

Directions

  1. Heat the oven to 375°F. Lightly coat the baking dish with olive oil cooking spray.
  2. Cook the frozen squash and sweet potatoes according to their package directions until just tender. Drain thoroughly and let stand in a colander for about 5 minutes so excess moisture can escape. Handle gently to keep the pieces intact.
  3. Whisk the cornstarch into the cold fat-free half-and-half in a small saucepan. Add thyme, rosemary, pepper, nutmeg, and optional garlic.
  4. Warm over medium-low heat, stirring constantly, until the sauce lightly thickens. Avoid a hard boil. Remove from the heat and stir in ¼ cup Swiss cheese.
  5. Place the drained vegetables in the baking dish. Pour the sauce over them and gently fold together. Sprinkle with the remaining ¼ cup Swiss cheese and the Parmesan.
  6. Bake uncovered for 20–25 minutes, until hot throughout and lightly golden on top. Let rest 5–10 minutes before serving so the sauce can settle.

Helpful notes

• For less sodium: Choose plain, unseasoned frozen vegetables and compare cheese labels. No salt is added to this recipe, but the dairy ingredients still contribute sodium.

• For the best texture: Thorough draining is especially important with frozen vegetables. Avoid overcooking them before assembling.

• Prefer Gruyère? Use the same modest quantity in place of Swiss for a flavor closer to the original.

A little RosemaryThyme note

A comforting dish doesn’t need heavy cream or a thick blanket of cheese. Sometimes a little cheese, fragrant herbs, and the natural sweetness of autumn vegetables are all we need to bring warmth to the table. 🌿💛

🛒 Browse my Walmart storefront:
https://walmrt.us/4xzgBgU

🏡 Visit RosemaryThyme Home:
https://rosemarythymehome.com

From my table to yours, with love.
Helene 😊
Rosemary Thyme 🌿
Fall in Love with Home Again. 💛🏡

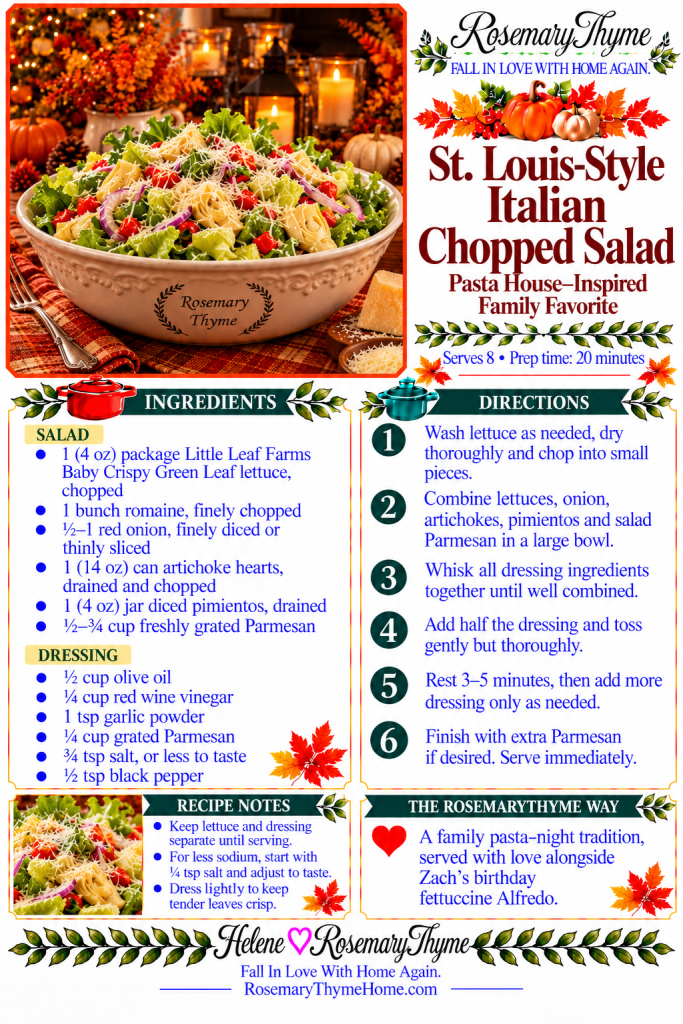
🌿🥬 Rosemary Thyme St. Louis-Style Italian Chopped Salad Pasta House–Inspired Family Favorite

#WalmartPartner — As a Walmart Creator, I may earn a commission from qualifying purchases made through my Walmart links.

🌿🥬 RosemaryThyme St. Louis-Style Italian Chopped Salad
Pasta House–Inspired Family Favorite

A Birthday Pasta Dinner for Zach 💛

Here in St. Louis, certain foods just feel like home. For our family, one of those has always been The Pasta House salad.

For years, we loved going there together. The pasta was wonderful, but the real star at our table was always the salad! After many tries at home, this became our family’s version, inspired by that classic local favorite.

For Zach’s birthday, we’re serving it alongside his requested Roman-style fettuccine Alfredo. Fresh, garlicky, tangy, and full of Parmesan, it’s a tradition that makes our pasta dinner feel complete. 💛

Serves: 8 as a side
Prep time: About 20 minutes

🥬 Salad Ingredients

• 1 – 4oz container of Little Leaf Farms crisp baby green leaf lettuce
• 1 bunch romaine lettuce, finely chopped
• ½–1 red onion, finely diced or very thinly sliced
• 1 (14-ounce) can Great Value artichoke hearts, drained and chopped
• 1 small jar (about 4 ounces) diced pimientos, drained
• ½–¾ cup freshly grated Parmesan cheese

🌿 Dressing Ingredients

• ½ cup Great Value extra virgin olive oil
• ¼ cup Great Value red wine vinegar
• 1 teaspoon Great Value garlic powder
• ¼ cup grated Parmesan cheese
• ¾ teaspoon salt, or less to taste
• ½ teaspoon black pepper

🥣 Directions

  1. Wash the lettuce and dry thoroughly. Chop into small, bite-size pieces.
  2. Place the iceberg, romaine, red onion, artichoke hearts, pimientos, and ½–¾ cup Parmesan in a large salad bowl.
  3. In a separate bowl, whisk together the olive oil, red wine vinegar, garlic powder, ¼ cup Parmesan, salt, and pepper until well combined. The dressing will look slightly creamy from the cheese.
  4. Pour half the dressing over the salad and toss thoroughly.
  5. Let stand for 3–5 minutes to allow the flavors to mingle.
  6. Toss again, adding more dressing only as needed. Finish with a little extra Parmesan, if desired, and serve immediately.

🌿 Kitchen Notes

• Chop the lettuce small—almost spoonable—for that familiar chopped-salad texture.
• Dry lettuce well so the dressing clings instead of becoming watery.
• For a milder onion flavor, soak the sliced onion in cold water for 10 minutes, then drain and pat dry.
• To prepare ahead, refrigerate the salad ingredients and dressing separately. Toss shortly before serving.
• For less sodium, start with ¼ teaspoon salt in the dressing and taste before adding more; the Parmesan contributes saltiness, too.

💛 A Little RosemaryThyme Note

Birthday dinners don’t have to be fancy to be meaningful. Sometimes they’re simply the foods our children have loved for years, made with care and served around the family table.

This salad belongs beside Zach’s birthday pasta—and beside so many happy memories.

You can find ingredients for your next family pasta night at Walmart. Shop through my storefront here:
https://walmrt.us/4xzgBgU

Visit RosemaryThyme Home for more recipes and cozy inspiration:
https://rosemarythymehome.com

From my table to yours with love,

Helene 😊

Rosemary Thyme 🌿

Fall in love with home again. 💛🏡

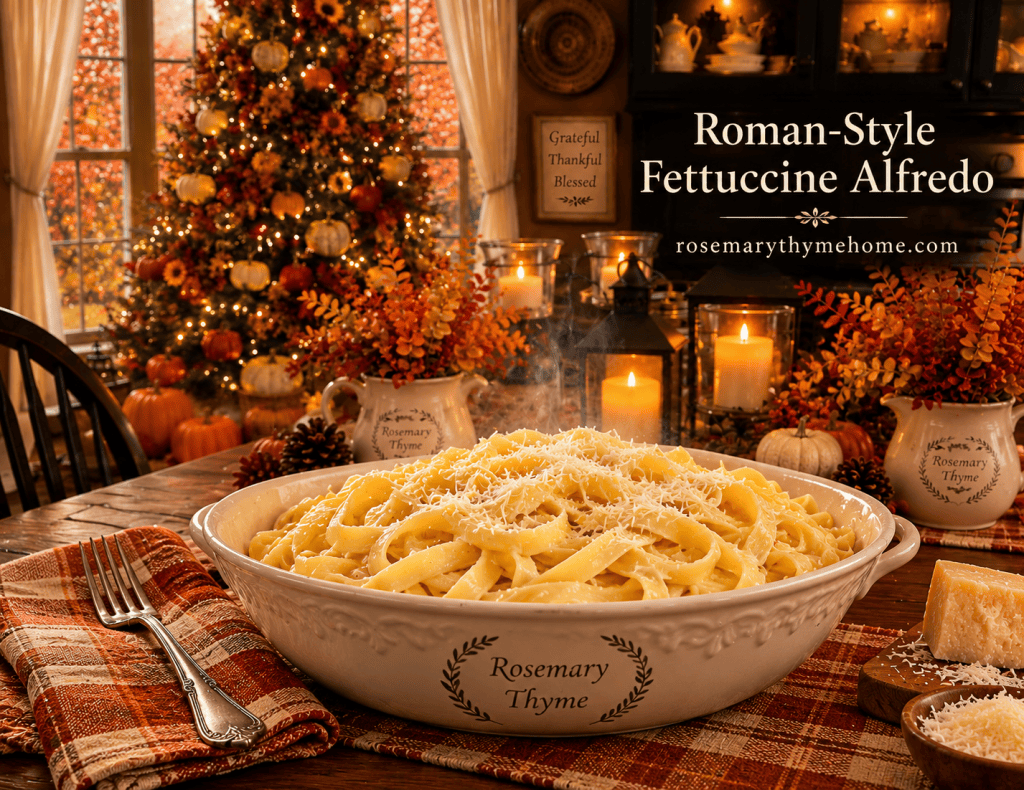
Roman-Style Fettuccine Alfredo

#WalmartPartner — As a Walmart Creator, I may earn a commission from qualifying purchases made through my Walmart links.

🌿💛 A Little Boy’s Favorite, All Grown Up

When Zach was just a little boy, my sister and I took him to an Italian restaurant and ordered him the children’s fettuccine Alfredo.

My little Zach practically inhaled it! 😊 He loved that pasta, and fettuccine Alfredo has been his favorite ever since.

So when he requested it for his 29th birthday, of course this mama was going to make it. But this year, he had something different in mind. He showed me a video and said he wanted to try the Roman style.

This version gets its silky sauce from butter, freshly grated Parmigiano Reggiano, and a little starchy pasta water. A short ingredient list, a little patient tossing, and a birthday dinner made with love.

We’ll be serving it with our family’s St. Louis–style Italian chopped salad—the other special request from the birthday boy. 🥬💛

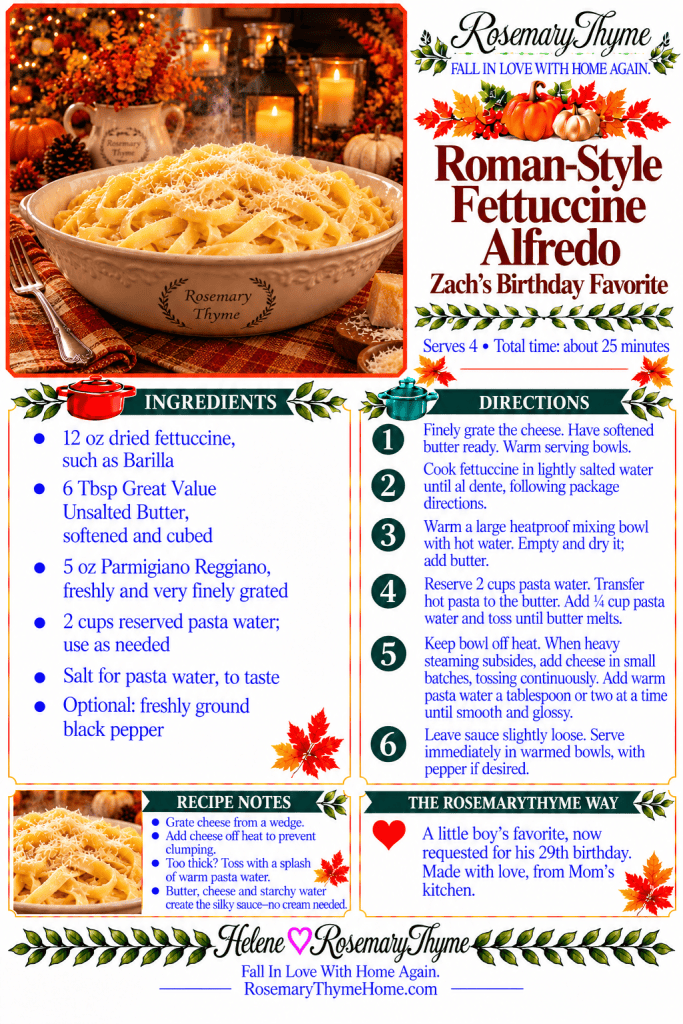
🌿 ROMAN-STYLE FETTUCCINE ALFREDO
Zach’s Birthday Dinner

Serves 4 • Ready in about 25 minutes

🛒 INGREDIENTS

• 12 ounces fettuccine, such as Barilla Fettuccine
• 6 tablespoons Great Value Unsalted Butter, softened and cut into small pieces
• 5 ounces Parmigiano Reggiano, freshly and very finely grated from a wedge
• 2 cups reserved pasta cooking water—you’ll use only what you need
• Salt for the pasta water, to taste
• Freshly ground black pepper, optional, for serving

For this recipe, look for a wedge labeled “Parmigiano Reggiano” when shopping at Walmart. Weigh the cheese before grating, since cup measurements vary considerably.

👩‍🍳 DIRECTIONS

  1. Prepare the ingredients.
    Finely grate the cheese and cut the softened butter into small pieces. Have everything ready before cooking the pasta.
  2. Cook the fettuccine.
    Bring about 3 quarts of water to a boil in a large pot. Salt lightly, remembering that the cheese adds saltiness. Add the fettuccine and cook according to the package directions until just al dente, stirring occasionally.
  3. Warm your mixing bowl.
    Fill a large heatproof mixing bowl with hot water. Once warmed, empty and dry it, then add the softened butter. Warm your serving bowls, too.
  4. Save the pasta water.
    Before draining, reserve 2 cups of the starchy cooking water. Transfer the hot noodles to the bowl with the butter. Add ¼ cup pasta water and toss until the butter melts and coats the noodles.
  5. Make the silky sauce.
    Keep the bowl off the heat. Once the butter has melted and the heavy steaming subsides, add the finely grated cheese in several small additions, tossing continuously. Add warm pasta water a tablespoon or two at a time until the sauce is smooth, glossy, and coats the fettuccine.
  6. Serve right away.
    Keep the sauce slightly loose because it thickens as it sits. Divide among warmed bowls and serve immediately, with black pepper if desired.

🌿 KITCHEN NOTES

• Freshly grated cheese is key. Choose a wedge rather than packaged shredded cheese for the smoothest results.

• Gentle warmth matters. Add the cheese off the heat; excessive heat can make it clump or become stringy.

• Keep tossing. That movement helps bring the butter, cheese, and starchy water together into a sauce.

• Too thick? Add a small splash of warm pasta water and toss again.

• Time dinner around the pasta. Prepare your salad first, then finish the Alfredo just before everyone sits down.

💛 A little RosemaryThyme note

Sometimes a favorite meal holds a whole chapter of family memories. I still picture that little boy enjoying his first plate of fettuccine Alfredo—and now I get to make it for his 29th birthday.

What a blessing it is to keep cooking for the people we love.

🛒 Browse my Walmart storefront:
https://walmrt.us/4xzgBgU

🏡 Visit RosemaryThyme Home:
https://rosemarythymehome.com

From my table to yours, with love.

Helene 😊
RosemaryThyme 🌿

Fall in Love with Home Again. 💛🏡
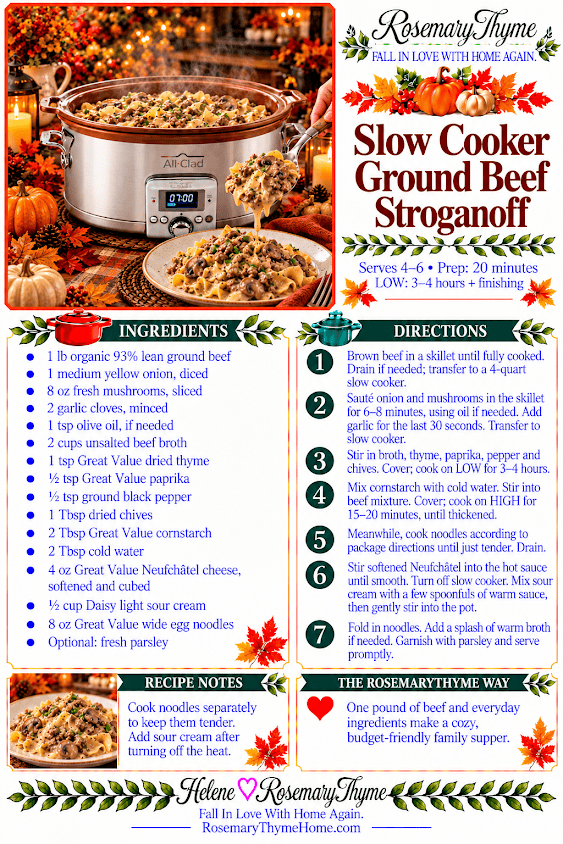
RosemaryThyme Slow Cooker Ground Beef Stroganoff

#WalmartPartner — As a Walmart Creator, I may earn a commission from qualifying purchases made through my Walmart links.

A cozy supper doesn’t have to be complicated or expensive. 🌿💛 This easy beef stroganoff starts with one pound of lean ground beef, adds mushrooms and a creamy sauce, and brings everyone to the table with a bowl of comforting egg noodles.

RosemaryThyme Slow Cooker Ground Beef Stroganoff

Serves: 4–6
Prep: About 20 minutes
Slow cooker: LOW for 3–4 hours, plus finishing time

Ingredients

  • 1 pound organic 93% lean ground beef from Walmart
  • 1 medium yellow onion, diced
  • 8 ounces fresh white mushrooms, sliced
  • 2 garlic cloves, minced
  • 1 teaspoon olive oil, if needed for sautéing
  • 2 cups unsalted beef broth
  • 1 teaspoon Great Value dried thyme
  • ½ teaspoon Great Value paprika
  • ½ teaspoon Great Value ground black pepper, or to taste
  • 1 tablespoon dried chives
  • 2 tablespoons Great Value cornstarch
  • 2 tablespoons cold water
  • 4 ounces Great Value Neufchâtel cheese, softened and cubed
  • ½ cup Daisy light sour cream
  • 8 ounces Great Value wide egg noodles
  • Optional: fresh parsley for serving

Directions

  1. Brown the beef. Cook the ground beef in a skillet over medium heat, breaking it into crumbles, until fully cooked. Drain if needed and transfer to a 4-quart slow cooker.
  2. Soften the vegetables. In the same skillet, cook the onion and mushrooms for about 6–8 minutes, adding the olive oil if needed. Stir in the garlic for the final 30 seconds. Transfer to the slow cooker.
  3. Let it simmer. Add the broth, thyme, paprika, pepper, and chives. Stir, cover, and cook on LOW for 3–4 hours.
  4. Thicken the sauce. Mix the cornstarch with the cold water until smooth. Stir into the slow cooker. Cover and cook on HIGH for 15–20 minutes, or until the sauce begins to thicken.
  5. Cook the noodles. Meanwhile, cook the egg noodles according to the package directions until just tender. Drain.
  6. Make it creamy. Stir the softened Neufchâtel cheese into the hot beef mixture until smooth. Turn off the slow cooker. In a small bowl, mix the sour cream with a few spoonfuls of warm sauce, then gently stir it into the pot.
  7. Bring it together. Fold in the cooked noodles and serve promptly. Sprinkle with parsley, if desired.

Helpful Notes

• Cooking the noodles separately helps keep them tender and prevents them from absorbing all the sauce.

• For a thinner sauce, stir in a splash of warm broth.

• Frozen sliced mushrooms can replace fresh; sauté until the excess liquid evaporates.

• Onion, garlic, and mushrooms may be omitted to suit your household.

• Refrigerate leftovers within two hours and use within 3–4 days. Reheat gently with a splash of broth.

A little RosemaryThyme note 🌿

One package of ground beef, a few everyday ingredients, and a little help from the slow cooker—that’s my kind of family supper. Serve with green beans or a simple salad and enjoy a peaceful meal together.

Browse my Walmart finds:
https://walmrt.us/4xzgBgU

Visit RosemaryThyme Home:
https://rosemarythymehome.com

Fall in Love with Home Again. 🌿💛🏡

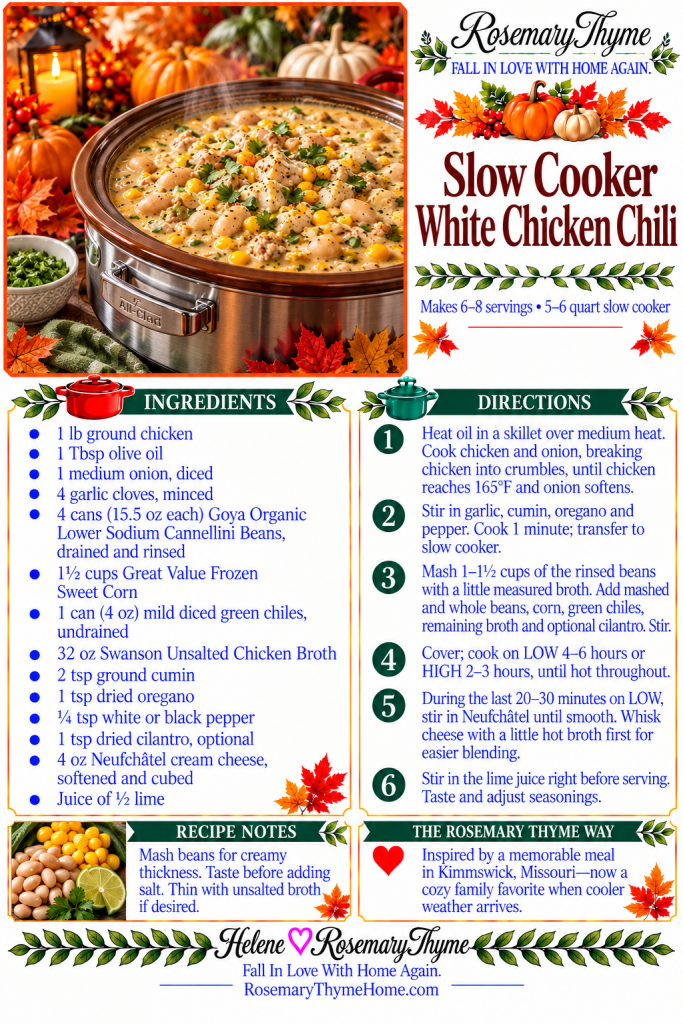
🌿 RosemaryThyme Slow Cooker White Chicken Chili

Screenshot

#WalmartPartner — As a Walmart Creator, I may earn a commission from qualifying purchases made through my Walmart links.

Many years ago, we tried white chicken chili for the very first time at a restaurant in Kimmswick, Missouri. It was so delicious that I came home determined to create my own version!

Over the years, this one has become a family favorite. We especially love using ground chicken—it gives each spoonful that hearty texture we enjoy in traditional ground beef chili. As soon as the weather turns cooler, this comforting meal finds its way back into our weekly lineup. There’s nothing quite like a warm bowl of chili on a chilly evening! 💛🏡

🌿 RosemaryThyme Slow Cooker White Chicken Chili

Creamy white beans, ground chicken, sweet corn, and warm spices come together with a little Neufchâtel cream cheese and a bright squeeze of lime.

Makes approximately 6–8 servings
Slow cooker: 5–6 quarts

🛒 Ingredients

• 1 pound ground chicken
• 1 tablespoon Great Value Olive Oil
• 1 medium onion, diced
• 4 cloves garlic, minced
• 4 cans (15.5 ounces each) Goya Organic Lower Sodium Cannellini Beans, drained and rinsed well
• 1½ cups Great Value Frozen Sweet Corn
• 1 can (4 ounces) mild diced green chiles, undrained
• 1 carton (32 ounces) Swanson Unsalted Chicken Broth
• 2 teaspoons Great Value Organic Ground Cumin
• 1 teaspoon Great Value Organic Dried Oregano
• ¼ teaspoon white pepper, or black pepper if preferred
• 1 teaspoon dried cilantro, optional
• 4 ounces Neufchâtel cream cheese, softened and cubed
• Juice of ½ lime

🥣 Directions

  1. Heat the olive oil in a large skillet over medium heat. Add the ground chicken and onion. Cook, breaking the chicken into small crumbles, until the chicken is fully cooked to 165°F and the onion has softened. Stir in the garlic, cumin, oregano, and pepper; cook for another minute.
  2. Drain and rinse the cannellini beans well. Set aside 1–1½ cups of the beans and mash with a fork or potato masher, adding a little of the measured broth to help them become creamy.
  3. Transfer the chicken mixture to your slow cooker. Add the whole beans, mashed beans, frozen corn, green chiles, remaining broth, and dried cilantro, if using. Stir gently.
  4. Cover and cook on LOW for 4–6 hours or HIGH for 2–3 hours, until hot throughout and the flavors have blended.
  5. During the last 20–30 minutes, turn the slow cooker to LOW and add the softened, cubed Neufchâtel cream cheese. For a smoother finish, whisk the cheese with a little hot broth from the pot in a separate bowl, then stir it back into the chili. Cover and let it blend, stirring occasionally until smooth.
  6. Stir in the juice of ½ lime right before serving. Taste and adjust the seasonings as desired, then ladle into bowls and enjoy!

🌿 Recipe Notes

• Mashing some of the beans gives the chili creamy thickness without flour or heavy cream.

• Lower-sodium beans, a thorough rinse, and unsalted broth help keep the sodium lower. The beans, green chiles, and cheese still contribute some salt, so taste before adding any extra.

• Prefer a thinner chili? Stir in a little additional unsalted broth. For a thicker chili, mash a few more beans.

• Optional toppings include chopped cilantro, avocado, or a small spoonful of plain Greek yogurt.

• Refrigerate leftovers promptly in shallow containers and enjoy within 3–4 days. Reheat individual portions gently, adding a splash of broth if needed.

💛 A little RosemaryThyme note

Some of our favorite family recipes begin with a meal we enjoyed somewhere else, then become our own over the years. This chili is one of those recipes for us—warm, comforting, and always welcome when the cooler days return.

🛒 Shop my Walmart favorites:
https://walmrt.us/4xzgBgU

🏡 Visit me at:
https://RosemaryThymeHome.com

Helene 😊
Rosemary Thyme 🌿
Fall In Love With Home Again 💛🏡

🌿 Rosemary Thyme Slow Cooker Pizza Casserole

#WalmartPartner — As a Walmart Creator, I may earn a commission from qualifying purchases made through my Walmart links.

Friday nights are a little sweeter when supper is warm, comforting, and full of flavors the family loves. 💛🍕

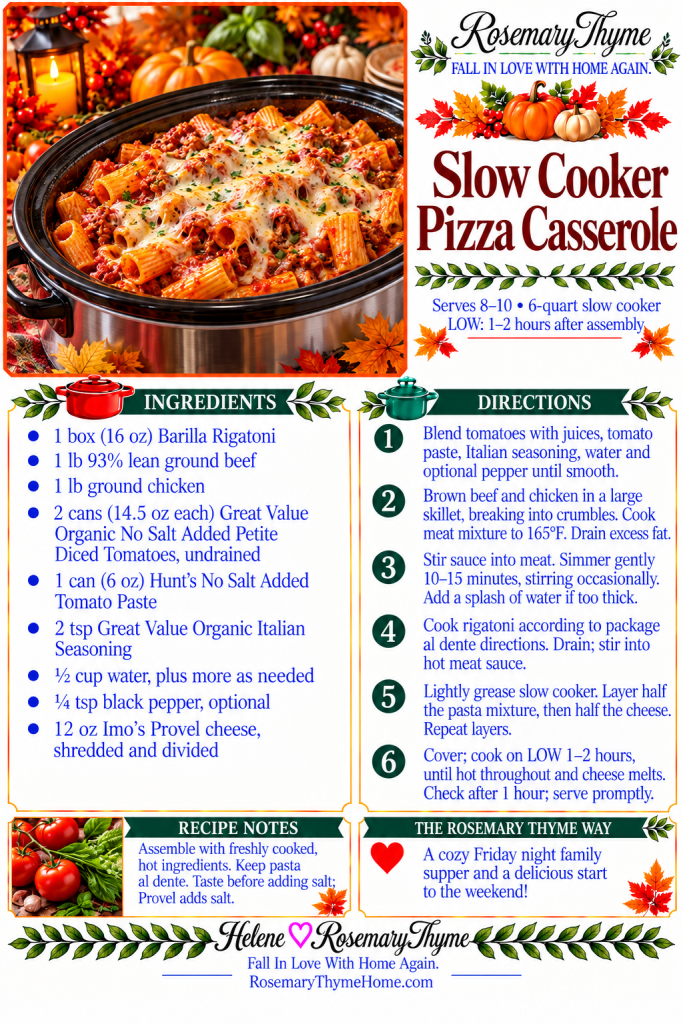
We love this pizza version of pasta casserole! Tender rigatoni, ground beef and chicken, a smooth homemade tomato sauce, and melted Imo’s Provel cheese make such a cozy meal. Finishing it in the crockpot makes serving convenient—a delicious way to welcome the weekend.

🌿 RosemaryThyme Slow Cooker Pizza Casserole

Serves: 8–10
Slow cooker: 6-quart
Slow cooker time: Approximately 1–2 hours on LOW

🛒 Ingredients

• 1 box (16 ounces) Barilla Rigatoni
• 1 pound 93% lean ground beef
• 1 pound ground chicken
• 2 cans (14.5 ounces each) Great Value Organic No Salt Added Petite Diced Tomatoes, undrained
• 1 can (6 ounces) Hunt’s No Salt Added Tomato Paste
• 2 teaspoons Great Value Organic Italian Seasoning
• ½ cup water, plus more as needed
• ¼ teaspoon black pepper, optional
• 12 ounces Imo’s Provel cheese, shredded and divided

🍲 Directions

  1. Add the undrained tomatoes, tomato paste, Italian seasoning, water, and optional black pepper to a blender or food processor. Blend until smooth.
  2. In a large skillet over medium heat, cook the ground beef and ground chicken, breaking them into small pieces, until fully cooked. The meat mixture should reach 165°F. Drain excess fat if needed.
  3. Stir the smooth tomato sauce into the cooked meat. Bring to a gentle simmer and cook for 10–15 minutes, stirring occasionally. Add a splash of water if needed to keep the sauce slightly loose.
  4. Cook the rigatoni according to the package’s al dente directions. Drain, then stir into the hot meat and sauce mixture.
  5. Lightly grease the crockpot insert. Add half the rigatoni and meat sauce mixture, then sprinkle with half the Provel cheese. Repeat with the remaining pasta mixture and cheese.
  6. Cover and cook on LOW for approximately 1–2 hours, just until hot throughout and the cheese is melted. Begin checking after 1 hour and serve promptly for the best pasta texture.

📝 Recipe Notes

• Assemble with freshly cooked, hot ingredients. The crockpot provides a gentle finish for the casserole.
• Cooking the rigatoni al dente helps it hold its shape during the slow cooker finish.
• Provel adds that familiar St. Louis pizza flavor! Taste the meat sauce before adding any salt, since the cheese contributes salt of its own.
• If making ahead and refrigerating, reheat to 165°F in the oven or microwave before transferring to the crockpot for holding.

🌿 A little RosemaryThyme note

There’s something comforting about gathering around a simple Friday night supper. A warm plate of pizza casserole, a little conversation, and the weekend ahead—sometimes those everyday moments are the ones we treasure most. 💛🏡

Shop my Walmart favorites:
https://walmrt.us/4xzgBgU

Visit me at:
https://RosemaryThymeHome.com

Helene 😊
Rosemary Thyme 🌿
Fall In Love With Home Again 💛🏡
RosemaryThymeHome.com

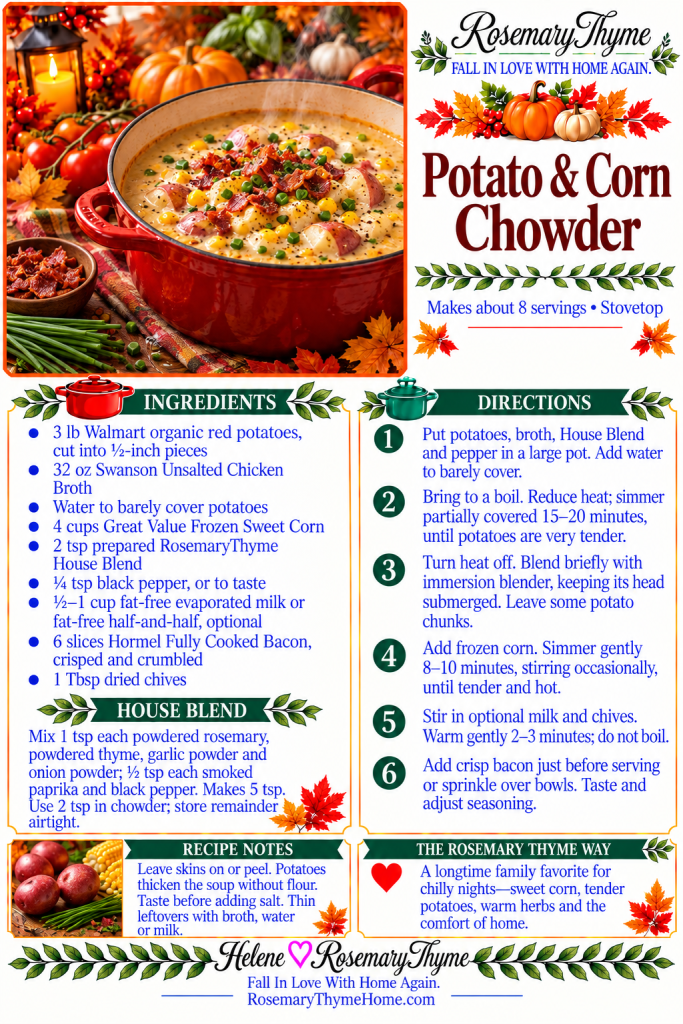
Rosemary Thyme Homestyle Potato & Corn Chowder

#WalmartPartner — As a Walmart Creator, I may earn a commission from qualifying purchases made through my Walmart links.

When fall arrived, there were always certain meals my family looked forward to—favorites we didn’t usually have during the warmer months. This potato and corn chowder is definitely one of them. 🍂

I’ve made it for decades, and it’s such a filling, comforting meal on a chilly night. I blend some of the softened potatoes to make a creamy base while leaving plenty of tender chunks, then add the sweet corn. A little milk, crisp bacon, and chives finish it beautifully.

🌿 RosemaryThyme Homestyle Potato & Corn Chowder

Makes about 8 servings

Ingredients
• 3 pounds Walmart organic red potatoes, scrubbed and cut into ½-inch pieces
• 1 carton (32 ounces) Swanson Unsalted Chicken Broth
• Water as needed to barely cover the potatoes
• 4 cups Great Value Frozen Sweet Corn
• 2 teaspoons RosemaryThyme seasoning blend—our blend of onion powder, garlic powder, paprika, thyme, and rosemary, made with Great Value Organic spices
• ¼ teaspoon black pepper, or to taste
• ½–1 cup fat-free evaporated milk or fat-free half-and-half, optional
• 6 slices Hormel Fully Cooked Bacon, crisped according to package directions and crumbled
• 1 tablespoon dried chives, or to taste

Directions

  1. Place the potatoes, chicken broth, RosemaryThyme seasoning blend, and black pepper in a large soup pot. Add just enough water to barely cover the potatoes.
  2. Bring to a boil, then reduce the heat. Simmer, partially covered, for 15–20 minutes, or until the potatoes are very tender.
  3. Remove the pot from the heat. Keeping the immersion blender head fully submerged, blend in short bursts to create a creamy base while leaving some potato chunks. You can also set aside a few scoops of potatoes before blending, then return them to the pot.
  4. Stir in the frozen corn. Return to a gentle simmer for 8–10 minutes, stirring occasionally, until the corn is tender and heated through.
  5. For a creamier chowder, stir in ½ cup fat-free evaporated milk or half-and-half, adding more if desired. Add the dried chives and warm gently for another 2–3 minutes. Avoid a rolling boil after adding the milk.
  6. Stir in the crisp bacon just before serving, or sprinkle it over each bowl. Taste and adjust the seasoning.

Recipe notes
🌿 Leave the potato skins on for a rustic chowder, or peel them if you prefer.
🌿 The blended potatoes provide the thickening, so there’s no need for flour or heavy cream.
🌿 Taste before adding salt—the bacon brings its own salty flavor.
🌿 If the chowder thickens as it sits, add a splash of unsalted broth, water, or milk when reheating.

A little RosemaryThyme note 💛
Sometimes the changing seasons bring us back to the simplest family traditions. A warm pot of chowder, familiar flavors, and everyone gathered for supper—that’s a little bit of home worth looking forward to.

Shop my Walmart favorites:
https://walmrt.us/4xzgBgU

Visit me at:
https://RosemaryThymeHome.com

Helene 😊
Rosemary Thyme 🌿
Fall In Love With Home Again 💛🏡
RosemaryThymeHome.com

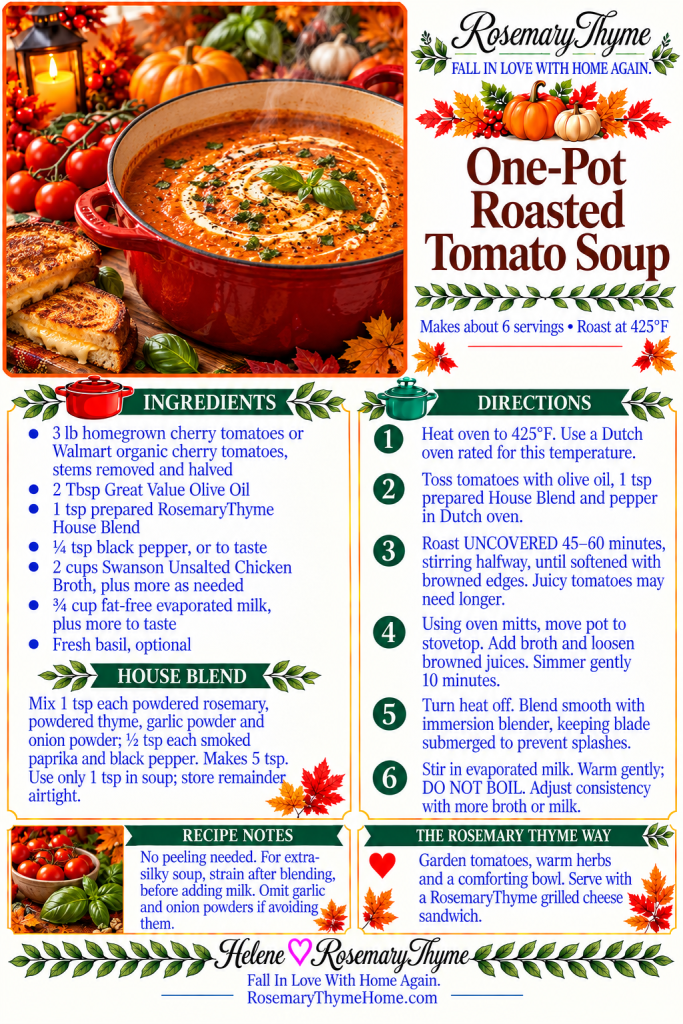
🍅 ROSEMARY THYME ONE-POT ROASTED TOMATO SOUP

#WalmartPartner — As a Walmart Creator, I may earn a commission from qualifying purchases made through my Walmart links.

🍅🌿 A little garden patience—and a pot of homemade soup.

I harvested all of my little Baxter tomatoes and have been waiting patiently for them to ripen in the kitchen, looking forward to making my homemade roasted tomato soup.

This soup has been a family favorite for a very long time. For this version, I’m keeping things simple: roasting the tomatoes right in my Dutch oven with olive oil and my RosemaryThyme seasoning blend, then adding unsalted chicken broth and blending everything into a comforting soup. A little fat-free evaporated milk stirred in at the end gives it a creamy finish.

And a RosemaryThyme grilled cheese sandwich goes beautifully alongside it! 🍞🧀

🍅 ROSEMARYTHYME ONE-POT ROASTED TOMATO SOUP
Makes approximately 6 servings

INGREDIENTS

• 3 pounds ripe Baxter tomatoes, stems removed; halve small tomatoes
• 2 tablespoons Great Value Olive Oil
• 1 teaspoon RosemaryThyme House Blend, recipe below
• ¼ teaspoon Great Value Organic Ground Black Pepper, or to taste
• 2 cups Swanson Unsalted Chicken Broth, plus more as needed
• ¾ cup fat-free evaporated milk, plus more to taste
• Optional: fresh basil for serving

🌿 ROSEMARYTHYME HOUSE BLEND

New to my kitchen? Here is my no-added-salt seasoning blend! I use Great Value Organic spices where available.

• 1 teaspoon powdered rosemary
• 1 teaspoon powdered thyme
• 1 teaspoon garlic powder
• 1 teaspoon onion powder
• ½ teaspoon smoked paprika
• ½ teaspoon ground black pepper

Mix together and store in a small, tightly sealed spice jar. This makes 5 teaspoons of seasoning—use just 1 teaspoon in this soup.

DIRECTIONS

  1. Preheat your oven to 425°F, checking that your Dutch oven is rated for that temperature.
  2. Place the prepared tomatoes in the Dutch oven. Add the olive oil, 1 teaspoon of the prepared House Blend, and the black pepper. Toss gently.
  3. Roast uncovered for 45–60 minutes, stirring halfway through, until the tomatoes soften and develop browned edges. Juicy tomatoes may need a little longer.
  4. Carefully transfer the Dutch oven to the stovetop using oven mitts—the pot and handles will remain very hot. Add the chicken broth and stir to loosen the flavorful browned juices from the bottom. Simmer gently for 10 minutes.
  5. Turn off the heat. Blend with an immersion blender until smooth, keeping the blade submerged to prevent hot splashes.
  6. Stir in the fat-free evaporated milk. Warm gently over low heat without boiling. Add a little more broth if you prefer a thinner soup, or a splash more milk for extra creaminess.

RECIPE NOTES 🍅

• No need to peel your little tomatoes—blend thoroughly. For an especially silky soup, strain after blending and before adding the milk.

• Roast uncovered so some of the tomato juices can evaporate and the flavor can concentrate.

• For anyone avoiding onion or garlic, leave those powders out of the seasoning blend.

• For a simple RosemaryThyme grilled cheese, sprinkle a small pinch of the prepared blend over your cheese before grilling your sandwich until golden.

💛 A little RosemaryThyme note

There is something so satisfying about watching those last garden tomatoes ripen, knowing they will become a meal your family loves. A warm pot of soup, a golden grilled cheese sandwich, and an autumn evening at home—that is my kind of comfort.

🛒 Browse my Walmart storefront:
https://walmrt.us/4xzgBgU

Find more recipes and cozy inspiration:
https://RosemaryThymeHome.com

Helene 😊
Rosemary Thyme 🌿
Fall In Love With Home Again 💛🏡
RosemaryThymeHome.com

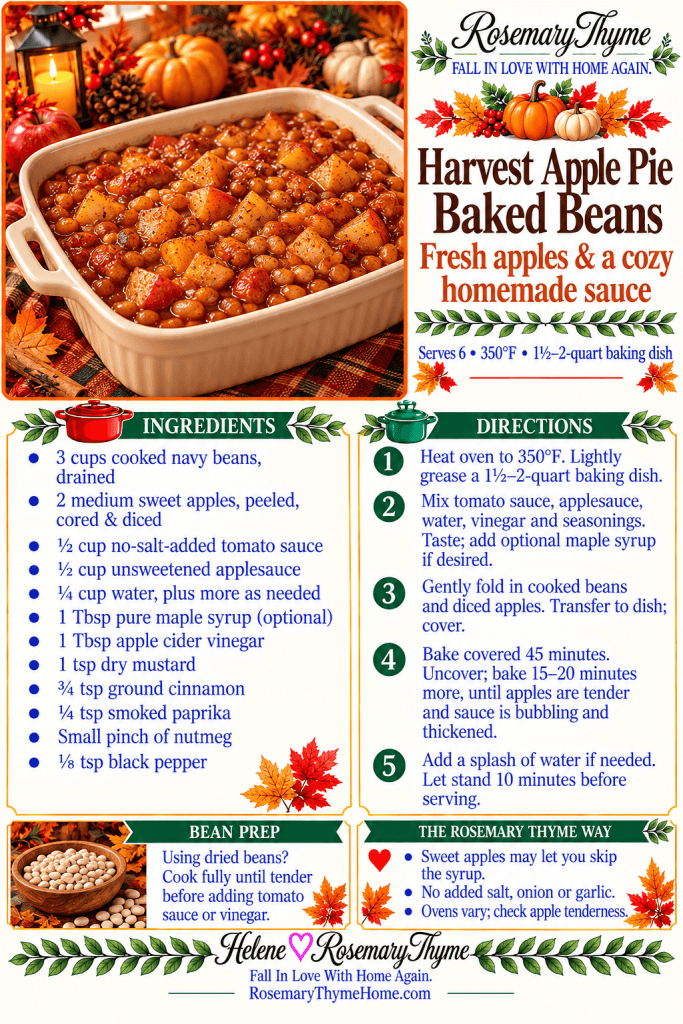
Rosemary Thyme Harvest Apple Pie Baked Beans

#WalmartPartner — As a Walmart Creator, I may earn a commission from qualifying purchases made through my Walmart links.

There’s something about apples and cinnamon that makes the kitchen feel like fall. 🍎🍂

Apple pie baked beans sounded so cozy to me, but I wanted to make my own version with plain navy beans, fresh apples, and a homemade sauce. A little unsweetened applesauce adds sweetness and body, with just a touch of maple syrup if you’d like.

🌿 Rosemary Thyme Harvest Apple Pie Baked Beans
Fresh apples, tender navy beans, and a cozy homemade sauce
Makes about 6 servings

🍎 Ingredients

• 3 cups cooked navy beans, drained—home-cooked or about 2 cans of plain navy beans, drained and rinsed
• 2 medium Cosmic Crisp or Fuji apples, peeled, cored, and diced
• ½ cup no-salt-added tomato sauce
• ½ cup Great Value Organic Unsweetened Applesauce
• ¼ cup water, plus more if needed
• 1 tablespoon Great Value Pure Maple Syrup, optional
• 1 tablespoon apple cider vinegar
• 1 teaspoon dry mustard
• ¾ teaspoon ground cinnamon
• ¼ teaspoon smoked paprika
• A small pinch of ground nutmeg
• ⅛ teaspoon black pepper

🍂 Directions

  1. Preheat your oven to 350°F. Lightly grease a small baking dish, about 1½–2 quarts.
  2. In a bowl, stir together the tomato sauce, applesauce, water, vinegar, mustard, cinnamon, smoked paprika, nutmeg, and pepper. Taste and add the optional maple syrup if you’d like a little more sweetness.
  3. Gently fold in the cooked navy beans and diced apples. Spoon into the prepared baking dish and cover with a lid or foil.
  4. Bake covered for 45 minutes. Uncover and bake for another 15–20 minutes, until the apples are tender and the sauce is bubbling and thickened. Ovens vary; add a splash of water if the beans become too thick.
  5. Let stand for 10 minutes before serving.

🌿 Recipe Notes

• If using dried navy beans, cook them fully until tender before starting this recipe. Add the tomato sauce and vinegar after the beans are cooked.
• Sweet apples may give you enough sweetness to skip the maple syrup entirely.
• This recipe has no added salt, onion, or garlic. For less sodium, choose plain no-salt-added beans or cook your own without salt.
• Serve alongside roasted chicken or pork, or enjoy with a crisp fall salad.

💛 A little RosemaryThyme note

Making a dish from simple ingredients lets us choose what goes into it—and adjust the sweetness to suit our own table. These beans bring a little apple-pie warmth to a comforting fall side dish. 🍎🏡

Browse my Walmart favorites:
https://walmrt.us/4xzgBgU

Visit RosemaryThyme Home:
https://RosemaryThymeHome.com

Helene 😊
Rosemary Thyme 🌿
Fall In Love With Home Again 💛🏡
RosemaryThymeHome.com