#WalmartPartner — As a Walmart Creator, I may earn a commission from qualifying purchases made through my Walmart links.
🍊🌿 RosemaryThyme Cranberry-Orange Sparkler
I’ve already shared my apple cider mocktail, and this year I wanted something cranberry-bright for the Thanksgiving table. This ruby-red sparkler is tart and bubbly, with a little maple syrup to mellow the cranberries. My favorite touch is the rosemary sprig. You catch that lovely scent before you even take a sip!
Ingredients • Makes 1 glass
¼ cup unsweetened 100% cranberry juice
2 tablespoons orange juice
1 tablespoon fresh lime juice
1 tablespoon Great Value Pure Maple Syrup, or to taste
⅓ cup plus 2 teaspoons chilled Great Value plain sparkling water (3 fluid ounces)
Ice, an orange slice, and a small sprig of fresh rosemary
How to make it
Stir the cranberry juice, orange juice, lime juice, and maple syrup together in a glass. Taste and adjust the sweetness.
Add ice, top with chilled sparkling water, and stir gently.
Give the rosemary sprig a gentle clap between your palms to release its fragrance, then tuck it into the glass with an orange slice.
🍁 Make it ahead for Thanksgiving For six glasses, stir together 1½ cups cranberry juice, ¾ cup orange juice, 6 tablespoons lime juice, and up to 6 tablespoons maple syrup. Refrigerate the mixture. When guests are ready, divide it among six glasses with ice and top each with 3 ounces of sparkling water.
🫐 A little RosemaryThyme twist If you’re making my Blue Cranberries for Thanksgiving, save a few blueberries for the drinks! Crush a few thawed blueberries in the bottom of each glass before adding the ice and juice mixture. They’ll give it a deeper berry color and a touch of sweetness.
#WalmartPartner — As a Walmart Creator, I may earn a commission from qualifying purchases made through my Walmart links.
Some days call for a simple supper—something warm and nourishing that makes good use of what we already have. 💛
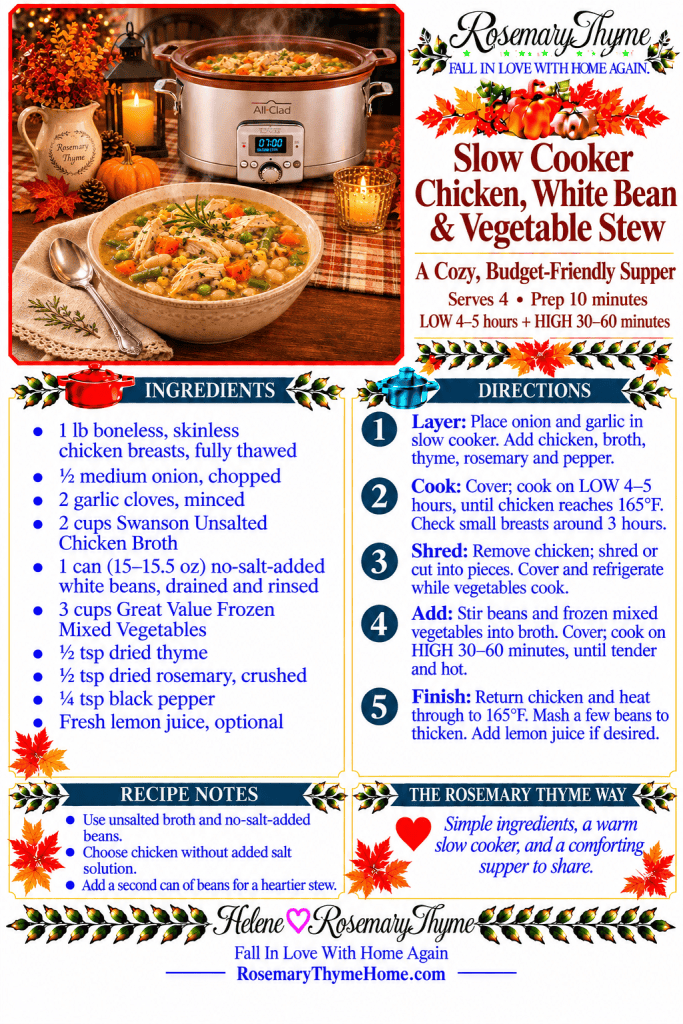
My slow cooker is the most-used piece of cooking equipment in my kitchen, and this cozy stew is another reason why! Tender chicken, creamy white beans, and Great Value frozen mixed vegetables come together in an herb-seasoned broth. It’s an affordable family meal made without cream, butter, or canned cream soup.
🌿 RosemaryThyme Slow Cooker Chicken, White Bean & Vegetable Stew
Makes approximately 4 servings
🛒 Ingredients
• 1 pound boneless, skinless chicken breasts, fully thawed • ½ medium onion, chopped • 2 garlic cloves, minced • 2 cups Swanson Unsalted Chicken Broth • 1 can (15–15.5 ounces) no-salt-added cannellini or great northern beans, drained and rinsed • 3 cups Great Value Frozen Mixed Vegetables • ½ teaspoon dried thyme • ½ teaspoon dried rosemary, crushed • ¼ teaspoon black pepper, or to taste • A squeeze of fresh lemon juice, optional
👩🍳 Directions
Place the chopped onion and garlic in the slow cooker. Arrange the thawed chicken breasts on top.
Pour in the unsalted chicken broth. Sprinkle with thyme, crushed rosemary, and black pepper.
Cover and cook on LOW for approximately 4–5 hours, until the chicken reaches an internal temperature of 165°F. Begin checking around 3 hours if your chicken breasts are small, as slow cookers vary.
Remove the cooked chicken and cut or shred into bite-size pieces. Cover and refrigerate while the vegetables cook.
Stir the drained beans and frozen mixed vegetables into the broth. Cover and cook on HIGH for approximately 30–60 minutes, or until the vegetables are tender and the stew is hot throughout.
Return the chicken to the slow cooker and heat through to 165°F. For a slightly thicker broth, mash a few of the beans against the side of the pot. Finish with a squeeze of lemon juice, if desired.
🌿 Helpful Kitchen Notes
• Choose chicken without an added salt solution, along with unsalted broth and no-salt-added beans, to help keep sodium down.
• For a heartier stew that stretches a little farther, add a second can of drained, rinsed white beans. Mash some before stirring them in for extra body without cream.
• The chicken and beans provide protein, while the mixed vegetables add color and variety—all in one comforting bowl.
💛 A little RosemaryThyme thought
A good supper doesn’t have to be expensive or complicated. Sometimes caring for our families looks like using what’s in the freezer, putting a few simple ingredients in the slow cooker, and letting that be enough.
#WalmartPartner — As a Walmart Creator, I may earn a commission from qualifying purchases made through my Walmart links.
Some of the most comforting suppers begin with taking a look at what we already have. 💛
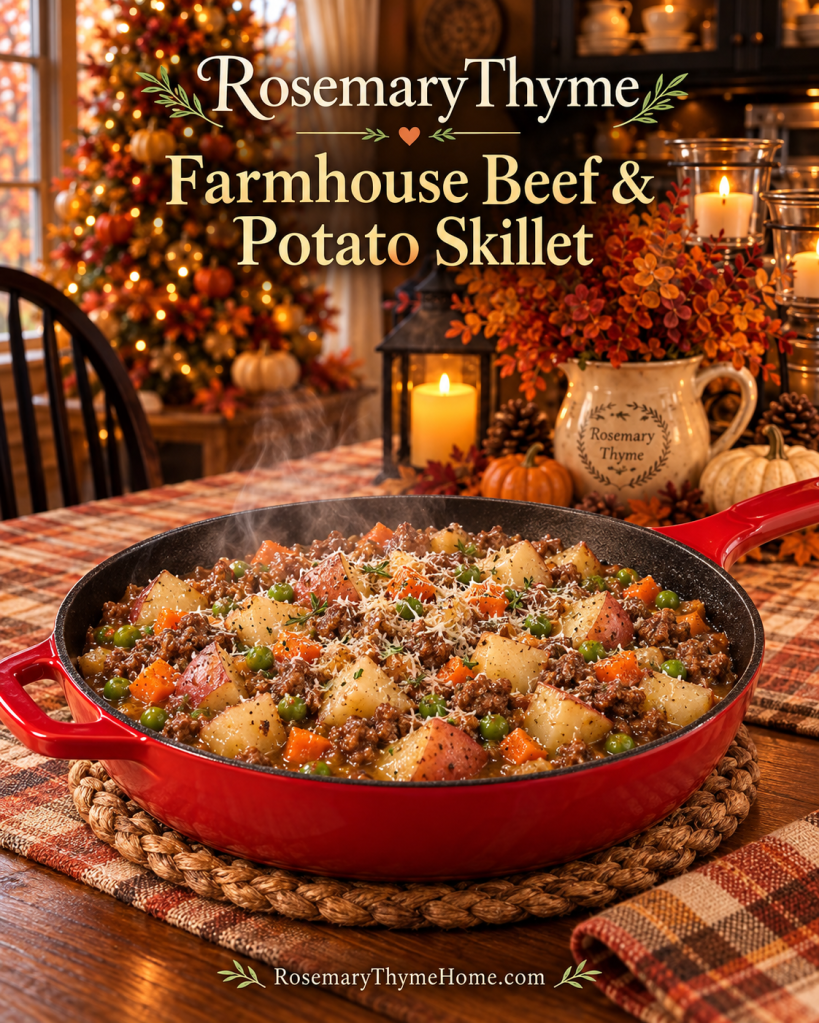
I had red potatoes in the refrigerator that needed to be used, ground beef in the freezer, and plenty of frozen vegetables. With peas and carrots and a little freshly grated Parmesan left from making soup, those simple ingredients became a cozy farmhouse supper!
I’ve been looking for more inexpensive meals, and this one stretches a pound of ground beef into four hearty servings. Everything cooks in my trusty Lodge cast-iron skillet—even the potatoes! 🌿
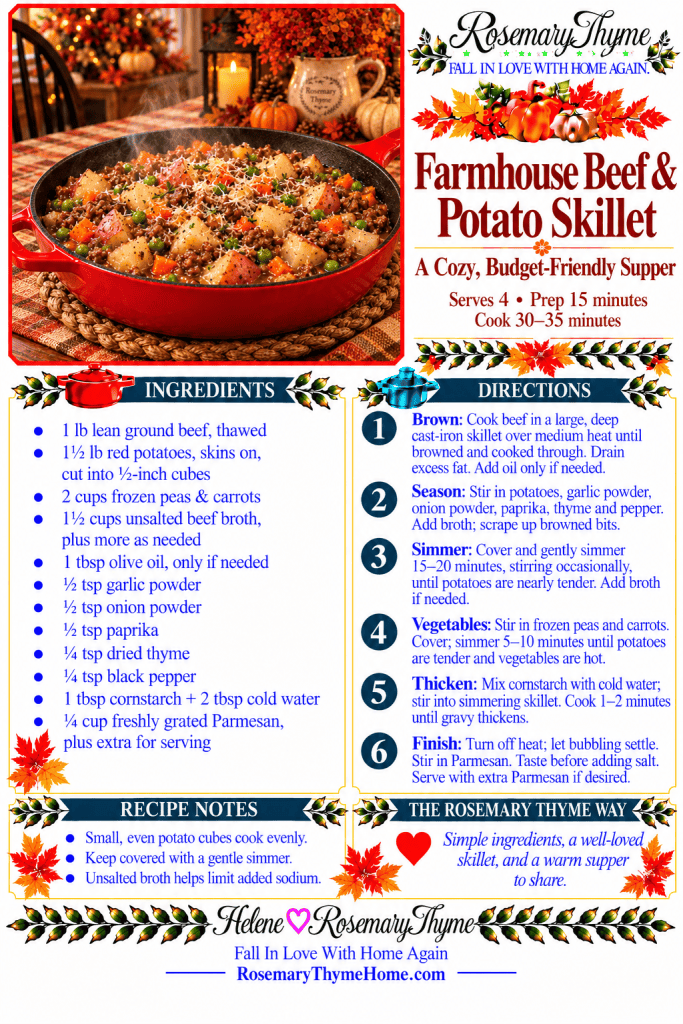
🥔 ROSEMARYTHYME FARMHOUSE BEEF & POTATO SKILLET
Tender red potatoes, savory ground beef, and sweet peas and carrots come together in a light Parmesan gravy.
• 1 pound 93% lean ground beef from Walmart, thawed • 1½ pounds red potatoes, scrubbed and cut into ½-inch cubes, skins on • 2 cups Great Value Frozen Peas & Carrots • 1½ cups unsalted beef broth, plus a little more as needed • 1 tablespoon olive oil, only if needed • ½ teaspoon Great Value Garlic Powder • ½ teaspoon Great Value Onion Powder • ½ teaspoon Great Value Paprika • ¼ teaspoon dried thyme • ¼ teaspoon black pepper, or to taste • 1 tablespoon cornstarch mixed with 2 tablespoons cold water • ¼ cup freshly grated Parmesan cheese, plus a little extra for serving
👩🍳 DIRECTIONS
Heat a large, deep cast-iron skillet over medium heat. Add the ground beef and cook, breaking it into crumbles, until browned and cooked through. Drain excess fat. If the skillet is very dry, add a little olive oil.
Stir in the cubed red potatoes, garlic powder, onion powder, paprika, thyme, and black pepper. Pour in the unsalted beef broth, scraping up the flavorful browned bits from the bottom.
Bring to a gentle simmer. Reduce the heat, cover with a lid or carefully tent with foil, and cook for 15–20 minutes, stirring occasionally, until the potatoes are nearly tender. Add a splash of broth if needed to keep the pan from becoming dry.
Stir in the frozen peas and carrots. Cover and simmer for another 5–10 minutes, until the potatoes are tender and the vegetables are hot throughout.
Stir the cornstarch and cold water mixture again, then add it to the gently simmering skillet. Cook and stir for 1–2 minutes, until a light gravy forms.
Turn off the heat and let the bubbling settle. Gently stir in the freshly grated Parmesan. Taste before adding any salt, and serve with a little extra Parmesan if desired.
🌿 HELPFUL KITCHEN NOTES
• Cut the potatoes into small, even cubes so they cook evenly. No peeling needed! • Unsalted broth helps keep added sodium down, while the herbs, spices, and Parmesan bring plenty of flavor. • Keep the skillet covered and the simmer gentle while the potatoes cook. • Thaw frozen ground beef in the refrigerator before making this recipe.
💛 A LITTLE ROSEMARYTHYME THOUGHT
Making good use of what we have is one of the quiet comforts of home cooking. A few potatoes, a package from the freezer, and a well-loved skillet can become a warm meal around the family table. Supper doesn’t have to be expensive to be something worth gathering for.
#WalmartPartner — As a Walmart Creator, I may earn a commission from qualifying purchases made through my Walmart links.
On a cloudy, cool fall Sunday, there’s something comforting about knowing dinner is gently cooking while you enjoy the day. 🍂🏡
My slow cooker gets more use than any other piece of cooking equipment in my home! I love slow cooker recipes, and I especially enjoy adapting recipes for it. For a busy lifestyle, it’s perfect—and for a slower, retired lifestyle, it’s perfect, too. There’s something lovely about doing a little preparation early and sitting down to a warm, homemade meal later.
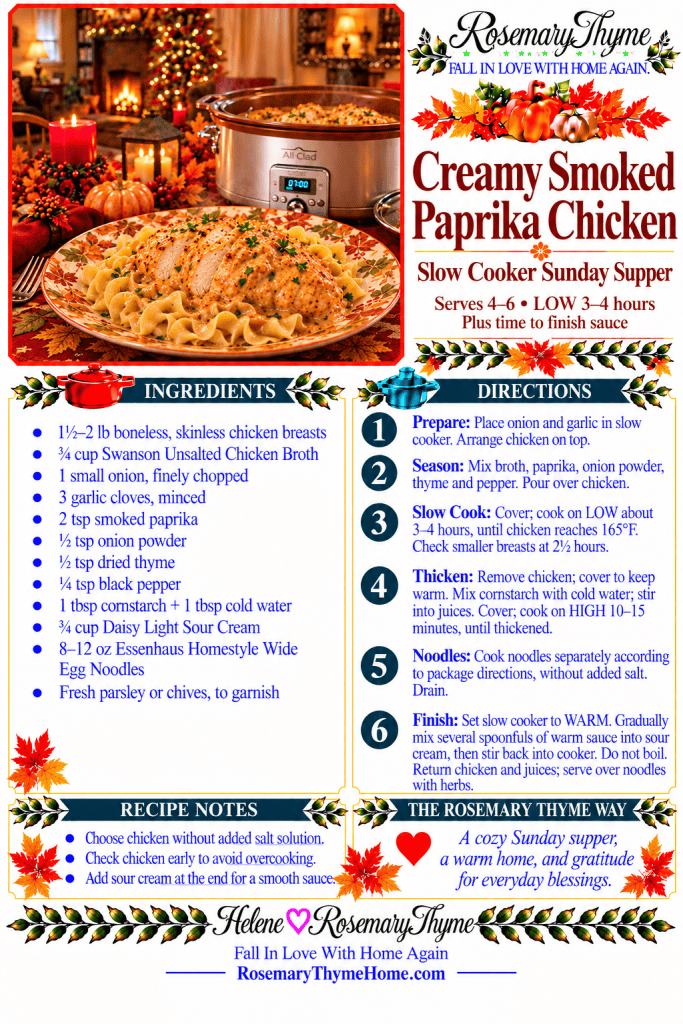
This creamy smoked paprika chicken is just that kind of supper: tender chicken breasts in a savory, smoky sauce, finished with Daisy Light Sour Cream and spooned over Essenhaus Homestyle Wide Egg Noodles. Simple, cozy comfort for a Sunday at home. 💛
Serves: 4–6 Cook time: Approximately 3–4 hours on LOW, plus time to finish the sauce
🛒 INGREDIENTS
• 1½–2 pounds boneless, skinless chicken breasts, without an added salt or broth solution when possible • ¾ cup Swanson Unsalted Chicken Broth • 1 small onion, finely chopped • 3 garlic cloves, minced • 2 teaspoons smoked paprika • ½ teaspoon Great Value Onion Powder • ½ teaspoon dried thyme • ¼ teaspoon black pepper • 1 tablespoon cornstarch mixed with 1 tablespoon cold water • ¾ cup Daisy Light Sour Cream • 8–12 ounces Essenhaus Homestyle Wide Egg Noodles • Chopped fresh parsley or chives, for serving
🥄 DIRECTIONS
Place the chopped onion and garlic in the bottom of the slow cooker. Arrange the chicken breasts on top in as even a layer as possible.
Stir together the unsalted chicken broth, smoked paprika, onion powder, thyme, and black pepper. Pour over the chicken.
Cover and cook on LOW for approximately 3–4 hours. Begin checking smaller chicken breasts around 2½ hours. The chicken is done when the thickest part reaches 165°F.
Transfer the cooked chicken to a plate and cover. Stir the cornstarch and cold water mixture, then stir it into the cooking juices. Cover and cook on HIGH for about 10–15 minutes, or until the sauce thickens.
Meanwhile, cook the Essenhaus noodles according to the package directions, omitting salt from the cooking water. Drain.
Turn the slow cooker to WARM. Place the Daisy Light Sour Cream in a small bowl and gradually stir in several spoonfuls of warm sauce. Gently stir this mixture back into the slow cooker until smooth. Do not allow the sauce to boil after adding the sour cream.
Return the chicken and any collected juices to the sauce. Serve whole or sliced over the warm egg noodles, with plenty of creamy sauce and a sprinkle of parsley or chives.
🌿 HELPFUL KITCHEN NOTES
• Unsalted broth, individual seasonings, and chicken without an added salt solution help keep added sodium down. Check your ingredient labels if you’re watching sodium closely.
• Smoked paprika gives this sauce its cozy flavor. Start with 2 teaspoons; for a stronger smoky taste, add another ½ teaspoon before stirring in the sour cream.
• Chicken breasts can dry out if cooked too long, so check their temperature early. Slow cookers vary, and thicker breasts may take longer.
• Cook the noodles separately for the best texture, especially if you’re planning on leftovers.
• Serve with steamed green beans or roasted carrots for a lovely fall supper.
💛 A LITTLE ROSEMARYTHYME THOUGHT
A slower Sunday gives us a chance to appreciate the comforts right in front of us—a warm home, something good cooking, and the people gathered around our table. Thank God for those everyday blessings. They are often the ones we treasure most.
#WalmartPartner — As a Walmart Creator, I may earn a commission from qualifying purchases made through my Walmart links.
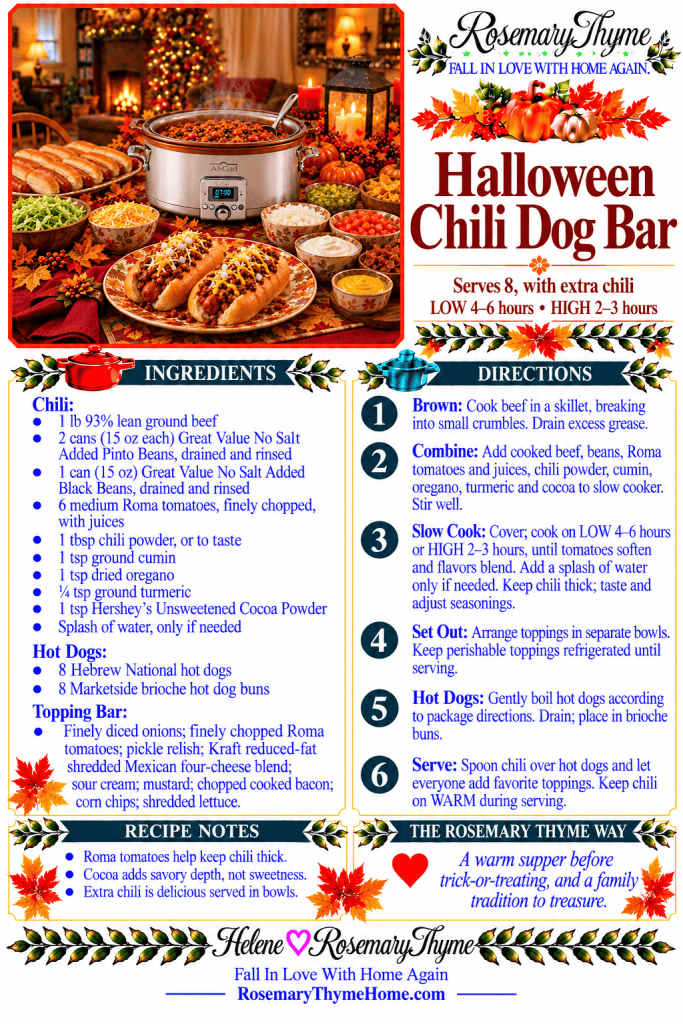
🎃🌭 RosemaryThyme Annual Halloween Chili Dog Bar 🍂
When my children were growing up, this was one of our favorite Halloween traditions! I would make my slow cooker chili early so we could have dinner before everyone headed out to trick-or-treat.
A warm meal before an evening of costumes and candy meant they weren’t coming home ravenous and wanting to make their entire supper out of Halloween candy. Well…that was the idea anyway! 😂🍬
I set out the hot dogs, buns, and little bowls of toppings so everyone could build a chili dog with everything they loved. It’s an easy, welcoming meal for a busy Halloween evening—and a tradition that still makes me smile. 💛
🌿 SLOW COOKER CHILI DOG BAR Serves approximately 8, with extra chili
For the chili:
• 1 pound Walmart 93% lean ground beef • 2 cans (15 ounces each) Great Value No Salt Added Pinto Beans, drained and rinsed • 1 can (15 ounces) Great Value No Salt Added Black Beans, drained and rinsed • 6 medium Roma tomatoes, finely chopped, including their juices • 1 tablespoon chili powder, plus more to taste • 1 teaspoon ground cumin • 1 teaspoon dried oregano • ¼ teaspoon ground turmeric • 1 teaspoon Hershey’s Unsweetened Cocoa Powder • A splash of water, only if needed
For the hot dogs:
• 8 Hebrew National hot dogs • 8 Marketside brioche hot dog buns
Brown the beef. Cook the ground beef in a skillet over medium heat, breaking it into small crumbles. Drain any excess grease.
Fill the slow cooker. Add the cooked beef, drained beans, chopped Roma tomatoes and their juices, chili powder, cumin, oregano, turmeric, and cocoa. Stir well.
Let it simmer. Cover and cook on LOW for 4–6 hours or HIGH for 2–3 hours, until the tomatoes soften and the flavors come together. Slow cookers vary, so check occasionally. Add just a splash of water if needed—you want thick chili that stays on the hot dogs! Taste and adjust the seasonings before serving.
Prepare the topping bar. Place each topping in its own small bowl. Keep the cheese, sour cream, bacon, and chopped vegetables refrigerated until serving time.
Cook the hot dogs. Shortly before dinner, cook the Hebrew National hot dogs in gently boiling water according to the package directions. Drain and place in the brioche buns.
Let everyone build their own! Spoon chili over each hot dog and invite everyone to add their favorite toppings. Keep the chili on the slow cooker’s WARM setting during serving.
🍅 A few RosemaryThyme tips
Roma tomatoes have a lovely, meaty texture for this chili. I also set out a separate bowl of finely chopped Romas for a fresh topping!
The little touch of cocoa adds depth to the chili without making it taste like chocolate.
For younger children—or anyone who prefers a milder chili—start with less chili powder and adjust to your family’s taste.
💛 A little RosemaryThyme thought
Sometimes the traditions our children remember most are the simple ones: a familiar supper, excitement around the table, and someone making sure their tummies were full before the adventure began. Those little moments become part of our family story.
#WalmartPartner — As a Walmart Creator, I may earn a commission from qualifying purchases made through my Walmart links.
Green bean casserole is always a favorite at the holiday table. There’s something comforting about a warm casserole passed around with the turkey, dressing, and all those special family dishes. 💛
This year, I’m making a tasty twist on the old-fashioned cream of mushroom soup and fried onion topping version. My recipe features a homemade creamy Swiss cheese sauce, just a little crisp bacon, and a golden panko topping tossed with olive oil, chives, and seasonings.
No-salt-added green beans give us a simple starting point, while the Swiss cheese and a small amount of bacon add wonderful flavor. It’s a familiar holiday favorite with a little Rosemary Thyme touch!
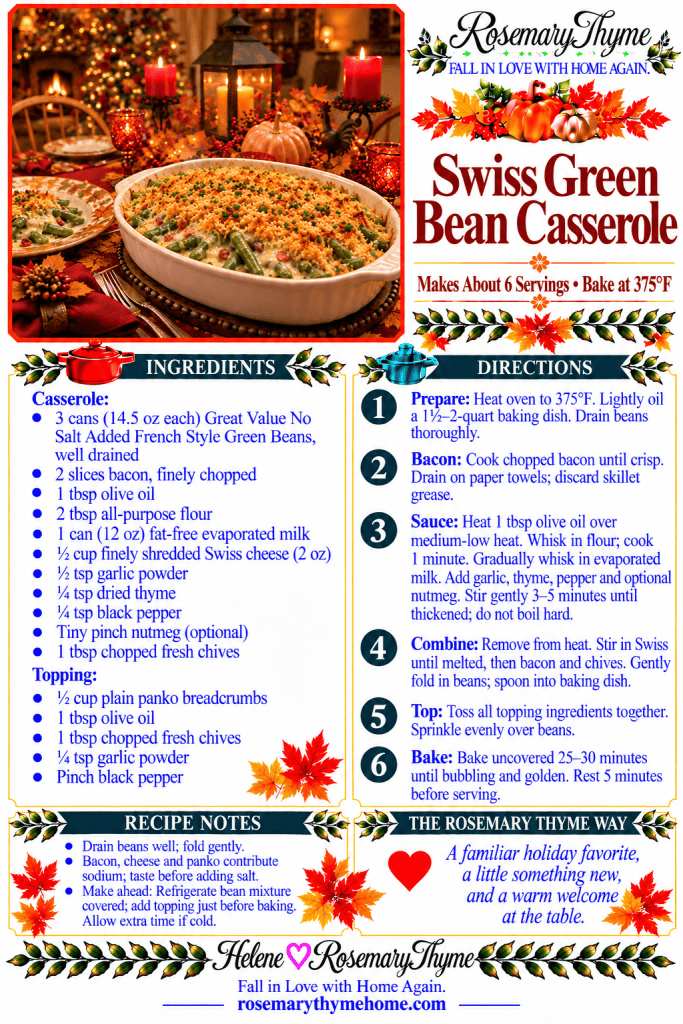
🌿 ROSEMARY THYME SWISS GREEN BEAN CASSEROLE Makes about 6 servings
🛒 INGREDIENTS
For the casserole: • 3 cans (14.5 ounces each) Great Value No Salt Added French Style Green Beans, thoroughly drained • 2 slices Great Value bacon, finely chopped • 1 tablespoon Great Value olive oil • 2 tablespoons Great Value all-purpose flour • 1 can (12 ounces) Great Value Fat Free Evaporated Milk • ½ cup finely shredded Great Value Swiss cheese, about 2 ounces—or finely chop Swiss cheese slices • ½ teaspoon Great Value garlic powder • ¼ teaspoon Great Value dried thyme • ¼ teaspoon Great Value ground black pepper • Tiny pinch of Great Value ground nutmeg, optional • 1 tablespoon chopped fresh chives
For the golden topping: • ½ cup Great Value plain panko breadcrumbs • 1 tablespoon Great Value olive oil • 1 tablespoon chopped fresh chives • ¼ teaspoon Great Value garlic powder • Pinch of Great Value ground black pepper
👩🍳 DIRECTIONS
Prepare the oven and beans. Preheat the oven to 375°F. Lightly oil a 1½- to 2-quart casserole dish. Drain the green beans thoroughly, allowing them to rest in a colander while you make the sauce.
Cook the bacon. Cook the chopped bacon in a skillet until crisp. Transfer to a paper towel-lined plate. Pour off the bacon grease.
Make the creamy sauce. Add 1 tablespoon olive oil to the skillet over medium-low heat. Whisk in the flour and cook, stirring, for about 1 minute. Gradually whisk in the evaporated milk until smooth.
Add the seasonings. Stir in the garlic powder, thyme, black pepper, and optional nutmeg. Cook gently, stirring frequently, for about 3–5 minutes, until thickened. Avoid a hard boil.
Stir in the Swiss. Remove the skillet from the heat. Stir in the Swiss cheese until melted, followed by the cooked bacon and 1 tablespoon fresh chives.
Assemble the casserole. Gently fold the drained green beans into the sauce, taking care with the delicate French-style beans. Spoon into the prepared casserole dish.
Add the topping. In a small bowl, toss the panko with 1 tablespoon olive oil, 1 tablespoon chives, garlic powder, and black pepper. Sprinkle evenly over the casserole.
Bake until golden. Bake uncovered for 25–30 minutes, until hot and bubbling around the edges and the topping is golden brown. Let stand for about 5 minutes before serving.
🌿 HELPFUL RECIPE NOTES
• Drain the beans well to help keep the sauce creamy. • Two slices of finely chopped bacon spread a little smoky flavor throughout the casserole. • Taste the finished sauce before adding salt—the bacon, Swiss cheese, and breadcrumbs already contribute some. • This recipe uses no-salt-added beans, but the finished casserole is not sodium-free. • To prepare ahead, assemble the bean mixture, cover, and refrigerate. Keep the topping separate and add just before baking. Allow extra baking time when starting with a cold casserole. • Use equivalent products if a particular Great Value item is unavailable.
💛 A little RosemaryThyme note
The holiday table has room for both treasured traditions and something a little new. Sometimes a simple change becomes another family favorite—one we look forward to passing around for years to come.
#WalmartPartner — As a Walmart Creator, I may earn a commission from qualifying purchases made through my Walmart links.
Some of the most comforting meals begin with a look through the pantry. 🌿🥣
I had chicken broth, canned tomatoes, white beans, frozen mixed vegetables, and macaroni on hand—and thought, why not bring them together in a cozy pot of minestrone?
With rosemary, thyme, garlic, and a little fresh lemon at the end, these simple ingredients become a warm, colorful soup. Using no-salt-added pantry staples lets us build flavor with herbs while keeping added salt out of the pot.
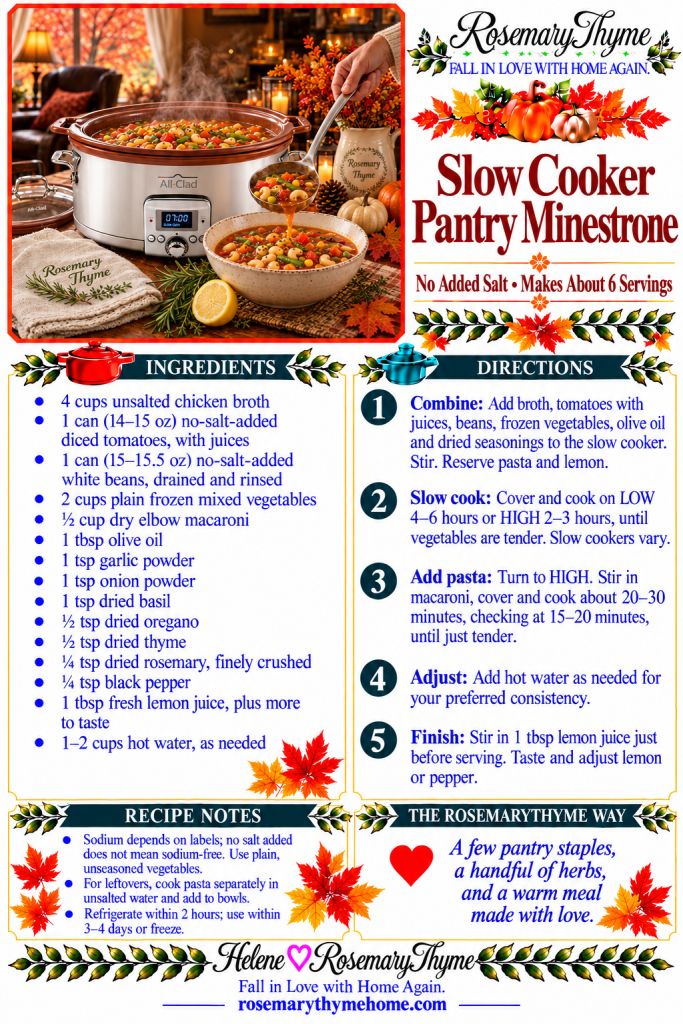
🌿 ROSEMARYTHYME SLOW COOKER PANTRY MINESTRONE No added salt • White beans & vegetables • A comforting pantry meal
Makes approximately 6 servings
🛒 INGREDIENTS
• 4 cups no-salt-added chicken broth, such as Swanson Unsalted Chicken Broth • 1 can (14–15 ounces) no-salt-added diced tomatoes, undrained • 1 can (15–15.5 ounces) no-salt-added white beans, drained and rinsed • 2 cups plain frozen mixed vegetables, such as Great Value • ½ cup dry elbow macaroni, such as Great Value • 1 tablespoon olive oil • 1 teaspoon garlic powder • 1 teaspoon onion powder • 1 teaspoon dried basil • ½ teaspoon dried oregano • ½ teaspoon dried thyme • ¼ teaspoon dried rosemary, finely crushed • ¼ teaspoon black pepper, or to taste • 1 tablespoon fresh lemon juice, plus more to taste • 1–2 cups hot water, only as needed
Use your favorite no-salt-added tomatoes and white beans—cannellini or great northern beans work beautifully. Choose garlic and onion powders rather than garlic or onion salt.
🥣 DIRECTIONS
Add the chicken broth, tomatoes with their juices, drained white beans, frozen vegetables, olive oil, and all the dried seasonings to the slow cooker. Stir gently. Reserve the macaroni and lemon juice.
Cover and cook on LOW for 4–6 hours or HIGH for 2–3 hours, until the vegetables are tender. Slow cookers vary, so begin checking at the earlier time.
Turn the slow cooker to HIGH. Stir in the dry macaroni, cover, and cook for approximately 20–30 minutes, checking at 15–20 minutes. Cook just until the pasta is tender.
If the soup becomes thicker than you like, stir in a little hot water until it reaches your preferred consistency.
Stir in 1 tablespoon fresh lemon juice just before serving. Taste and add a little more lemon or black pepper if desired.
🌿 HELPFUL KITCHEN NOTES
• For the lowest sodium, check every label and choose plain frozen vegetables without sauce or seasoning. “No salt added” does not necessarily mean sodium-free; the finished soup’s sodium depends on the products used.
• Skip Parmesan and seasoning blends containing salt to keep the sodium down.
• For a slightly thicker broth, mash a few white beans before adding them to the slow cooker.
• Planning on leftovers? Cook the macaroni separately in unsalted water and add it to individual bowls. This keeps it from absorbing the broth as the soup sits.
• Refrigerate leftovers within 2 hours. Enjoy within 3–4 days, or freeze portions for another meal.
💛 A LITTLE ROSEMARYTHYME NOTE
A comforting homemade meal doesn’t always require a long shopping list. Sometimes it begins with what we already have—a few pantry staples, a handful of herbs, and a little care.
There is something lovely about turning those everyday ingredients into a warm meal to share around the table. 🌿🥣
#WalmartPartner — As a Walmart Creator, I may earn a commission from qualifying purchases made through my Walmart links.
There is something so comforting about the aroma of a turkey roasting on Thanksgiving morning. The kitchen begins to smell like rosemary and thyme, and familiar holiday memories seem a little closer. 🦃💛
One of mine begins with a trip to Lake of the Ozarks.
After Dennis and I were first married, we enjoyed taking trips to the lake. It became one of our favorite places to bring our children, too. We loved wandering through the outlet mall, and a stop at a kitchen store was always a treat.
On one particular trip, I spotted a wonderful find on sale—a large Lenox turkey platter that I just loved. Dennis bought it for me, and that platter has been part of our family table for many years.
Every Thanksgiving, I look forward to bringing it out again. It reminds me of those trips to the lake, our children, and Dennis buying me something he knew I would treasure. What began as a lovely find in a kitchen store became a small piece of our family’s holiday story.
For this turkey, I’m bringing in some of the flavors I love from Mama and Oma’s German dressing—apples, celery, carrots, onion, and garlic—with a little of my RosemaryThyme House Seasoning.
This is a simple apple-and-vegetable filling, without bread. Our German bread dressing can bake separately, ready to serve alongside slices of golden, herb-roasted turkey—on that much-loved platter.
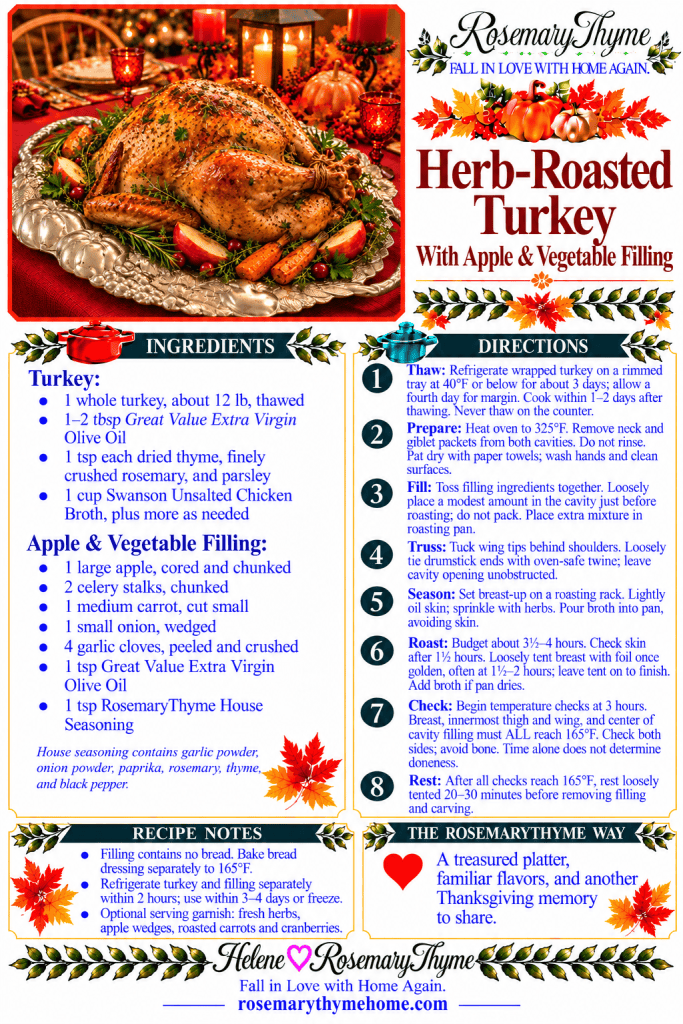
🌿 ROSEMARYTHYME HERB-ROASTED TURKEY With Apple & Vegetable Filling
For one approximately 12-pound turkey Oven temperature: 325°F Estimated roasting time: approximately 3½–4 hours; begin checking temperatures at 3 hours Resting time: 20–30 minutes
🛒 INGREDIENTS
For the apple-and-vegetable filling:
• 1 large apple, cored and cut into chunks • 2 celery stalks, cut into chunks • 1 medium carrot, cut into small chunks • 1 small yellow onion, cut into wedges • 4 garlic cloves, peeled and lightly crushed • 1 teaspoon Great Value Extra Virgin Olive Oil • 1 teaspoon RosemaryThyme House Seasoning—your blend of garlic powder, onion powder, paprika, powdered rosemary, powdered thyme, and black pepper
For the turkey:
• 1 whole turkey, approximately 12 pounds, completely thawed • 1–2 tablespoons Great Value Extra Virgin Olive Oil, enough for a light coating • 1 teaspoon Great Value Thyme Leaves • 1 teaspoon Great Value Rosemary Leaves, finely crushed • 1 teaspoon Great Value Parsley Flakes • 1 cup Swanson Unsalted Chicken Broth, plus more as needed for the roasting pan
You will also need a roasting pan with a rack, oven-safe kitchen twine, aluminum foil, and a food thermometer.
👩🍳 DIRECTIONS
THAW THE TURKEY
Allow approximately 3 days for a 12-pound turkey to thaw in the refrigerator, giving yourself a fourth day for a little margin. Keep it in its original wrapping on a rimmed tray on the bottom shelf, with the refrigerator at 40°F or below.
Once refrigerator-thawed, cook within 1–2 days.
For faster thawing, place the turkey in a leakproof bag and submerge it in cold water. Change the water every 30 minutes. Allow approximately 6 hours for a 12-pound turkey, and cook immediately after thawing this way. Never thaw turkey on the counter.
PREPARE AND PAT DRY
Preheat the oven to 325°F.
Remove the wrapping, neck, and giblet packets, checking both the main cavity and neck cavity.
Do not rinse the turkey. Pat the skin and cavity dry with paper towels and discard the towels. Wash your hands and thoroughly clean any surfaces or utensils that touched raw turkey.
MAKE THE APPLE-AND-VEGETABLE FILLING
Toss the apple, celery, carrot, onion, and garlic with 1 teaspoon olive oil and the RosemaryThyme House Seasoning.
Immediately before roasting, place a modest amount loosely inside the main cavity. Do not pack it tightly or fill every available space. Place any remaining mixture in the roasting pan.
TUCK AND LIGHTLY TRUSS
Tuck the wing tips behind the turkey’s shoulders.
Using oven-safe kitchen twine, loosely tie the drumstick ends together. Keep the cavity opening unobstructed and avoid pulling the legs tightly against the breast.
OIL AND SEASON
Place the turkey breast-side up on the rack in the roasting pan.
Brush the breast, legs, and exposed skin lightly with olive oil. Sprinkle evenly with thyme, finely crushed rosemary, and parsley.
Pour 1 cup unsalted chicken broth into the bottom of the pan, avoiding the seasoned skin.
ROAST UNTIL GOLDEN, THEN TENT
Place the turkey in the oven uncovered.
Begin checking the skin after approximately 1½ hours. When the breast reaches a lovely golden brown—often around 1½–2 hours—loosely tent the breast with aluminum foil.
Leave the foil over the breast for the remaining roasting time to help prevent excessive browning. Cover sooner if needed, or allow more uncovered time if the skin is still pale.
If the bottom of the pan becomes dry, carefully add a little more broth around the turkey.
CHECK THE TEMPERATURE
Budget approximately 3½–4 hours for roasting, but begin checking temperatures at about 3 hours. Timing is only a guide; the thermometer determines when the turkey is done.
Check all of the following, keeping the thermometer away from bone:
• Thickest part of each breast: at least 165°F • Innermost part of each thigh: at least 165°F • Innermost part of the wing: at least 165°F • Center of the apple-and-vegetable filling: at least 165°F
The filling must also reach 165°F because it comes into contact with raw turkey juices. Continue roasting if any area is below the safe temperature.
REST AND CARVE
Once all temperature checks pass, remove the turkey from the oven and tent loosely with foil.
Let it rest for 20–30 minutes before removing the filling and carving. Arrange the sliced turkey on a warm platter and serve with your favorite gravy and holiday sides.
📝 ROSEMARYTHYME NOTES
• This filling contains apples and vegetables, without bread. Bake your German bread dressing separately, until its center reaches 165°F.
• Your eyes tell you when to cover the skin; your thermometer tells you when the turkey is safely cooked.
• Avoid relying on skin color, clear juices, or a pop-up timer alone.
• If your turkey is labeled “basted,” “self-basting,” or “contains a solution,” it may already contain added salt. Check the label before adding seasoning containing salt.
• Refrigerate leftover turkey and filling separately in shallow containers within 2 hours. Use refrigerated leftovers within 3–4 days or freeze for longer storage.
💛 A LITTLE ROSEMARYTHYME NOTE
Sometimes the things we bring to our holiday table carry stories of their own—a favorite serving bowl, a handwritten recipe, or a turkey platter chosen on a family trip many years ago.
We bring them out, remember the people and moments connected to them, and make room for another year of memories. What a blessing to gather, share a meal, and thank God for those around our table.
#WalmartPartner — As a Walmart Creator, I may earn a commission from qualifying purchases made through my Walmart links.
Some of the flavors we remember most come from the holiday tables of our childhood.
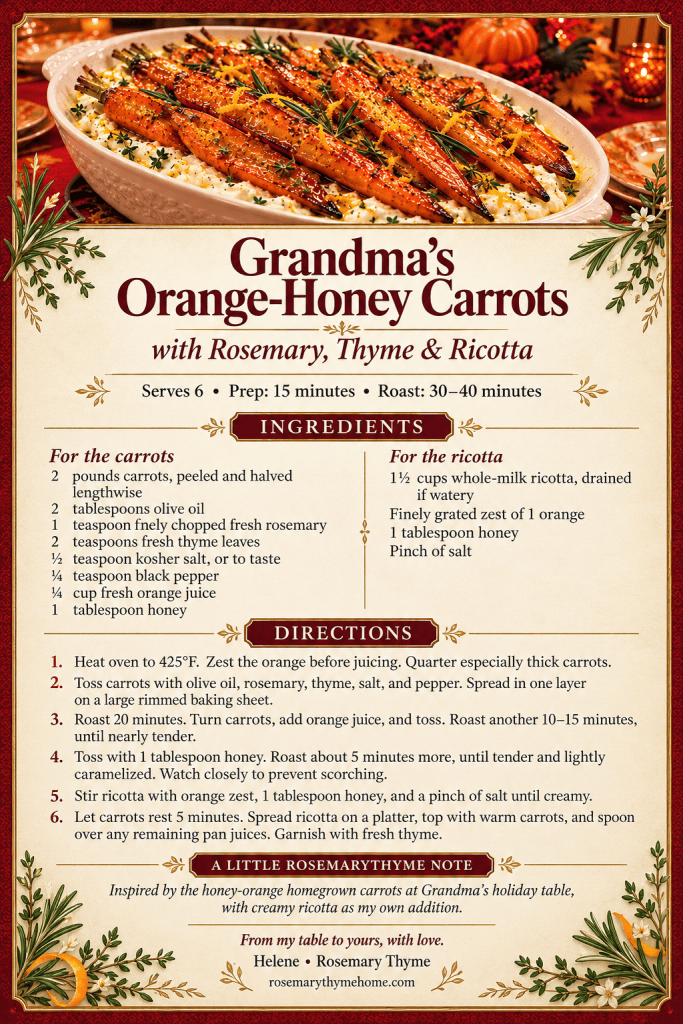
My grandma always served homegrown carrots with holiday dinner, and I still remember their lovely taste of honey and orange. This Thanksgiving, I’m bringing those flavors back to my own table with carrots roasted in olive oil, rosemary, and thyme, finished with orange juice and a little honey.
Grandma didn’t serve hers over ricotta. That’s my own addition—a creamy bed of ricotta with honey and orange zest, beneath those golden roasted carrots. A little of her kitchen, with a little of mine. 💛
🥕 GRANDMA’S ORANGE-HONEY CARROTS with Rosemary, Thyme & Honey-Orange Ricotta
For the carrots: • 2 pounds carrots, peeled and halved lengthwise; quarter especially thick carrots • 2 tablespoons olive oil • 1 teaspoon finely chopped fresh rosemary • 2 teaspoons fresh thyme leaves • ½ teaspoon kosher salt, or to taste • ¼ teaspoon black pepper • ¼ cup freshly squeezed orange juice • 1 tablespoon honey
For the ricotta: • 1½ cups whole-milk ricotta, drained if watery • Finely grated zest of 1 orange • 1 tablespoon honey • A pinch of salt
🌿 DIRECTIONS
Heat the oven to 425°F. Zest the orange before juicing it, keeping the zest aside for the ricotta.
Toss the carrots with olive oil, rosemary, thyme, salt, and pepper. Spread in a single layer on a large rimmed baking sheet.
Roast for 20 minutes. Turn the carrots, drizzle with ¼ cup orange juice, and toss gently. Roast for another 10–15 minutes, until nearly tender.
Drizzle the carrots with 1 tablespoon honey and toss gently. Return to the oven for about 5 minutes, until tender and lightly caramelized. Watch closely so the honey and orange juice don’t scorch.
While the carrots roast, stir the ricotta with the orange zest, remaining tablespoon of honey, and pinch of salt until creamy.
Spread the ricotta on a serving platter. Let the carrots rest for about 5 minutes, then arrange them over the ricotta. Spoon any remaining orange-honey pan juices over the carrots and garnish with a few fresh thyme leaves.
🌿 KITCHEN NOTE
Use just ¼ cup of orange juice in the roasting pan so the carrots can brown without sitting in too much liquid. Save any extra juice for another use.
The ricotta mixture can be made a day ahead and refrigerated. Take it out about 20 minutes before serving, then top with the freshly roasted carrots just before dinner.
💛 A little RosemaryThyme note.
Re-creating a family dish begins with remembering how it tasted and who was there to share it. These carrots are inspired by the honey and orange I remember from Grandma’s holiday table, with a new addition for the memories we’re making today.
What dish brings you back to your grandmother’s table?
🍂 SOME HOLIDAY MEMORIES BEGIN LONG BEFORE YOU REACH THE TABLE.
When my brothers and sisters and I were growing up, the long ride to Oma’s hometown of Breese gave us plenty of time to think about the meal waiting for us.
There would be turkey. There would be pies. Everything was wonderful.
But that dressing… ❤️
That was the dish we thought about on the way.
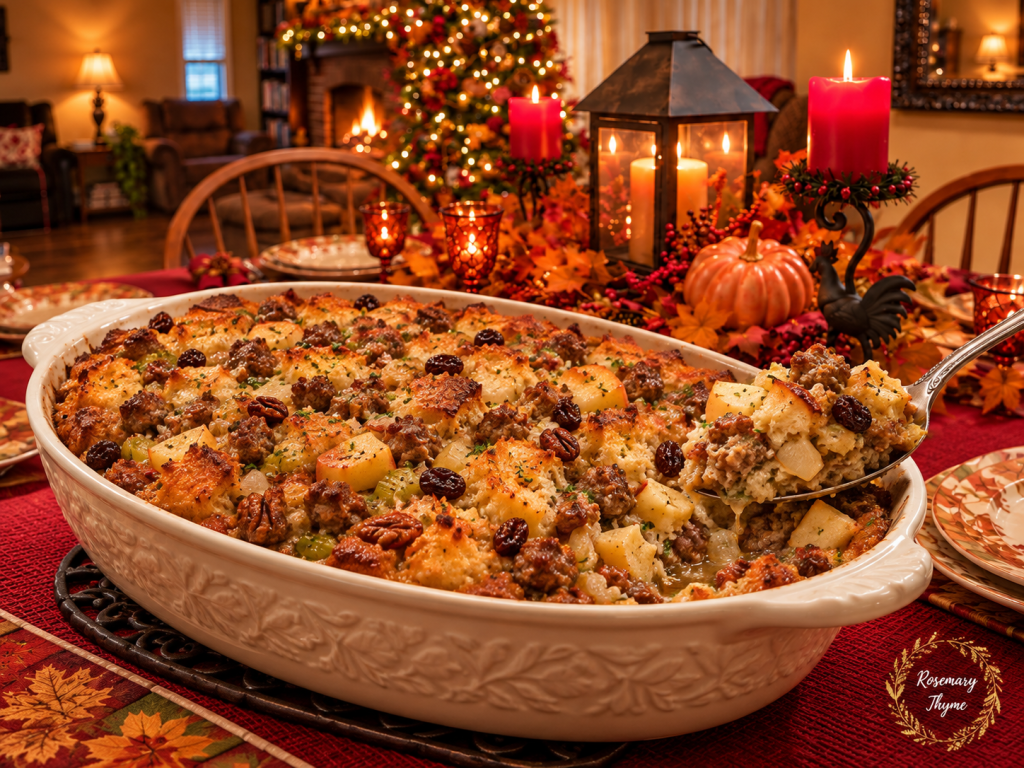
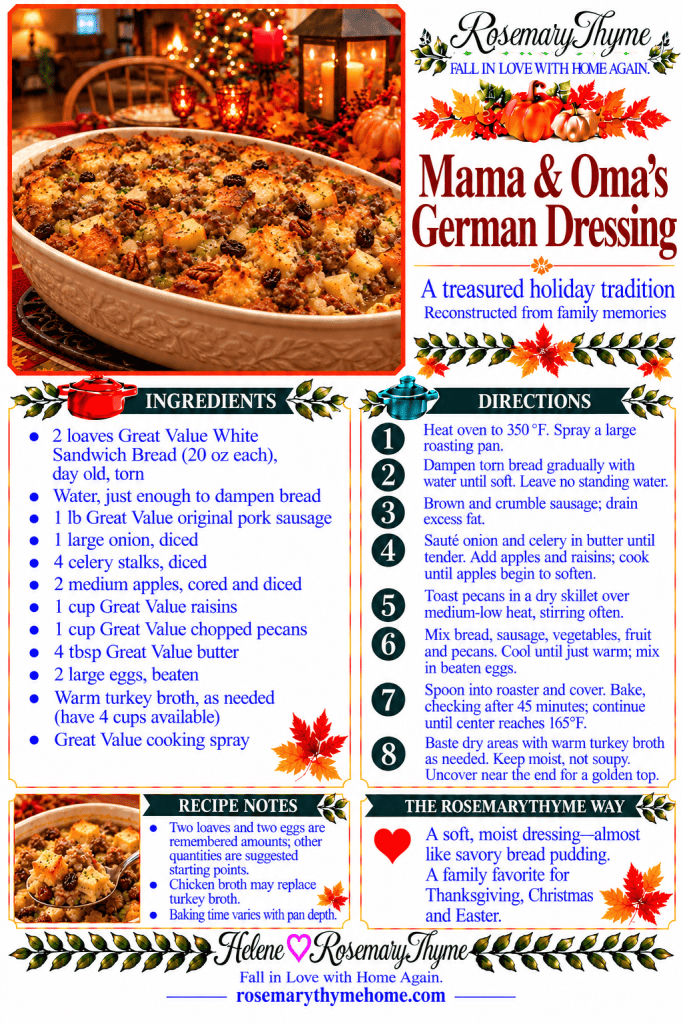
Mama and Oma’s German dressing was soft, moist, and almost like a savory bread pudding. There were apples and raisins tucked among the bread, toasted pecans, tender onion and celery, and mild breakfast sausage. Turkey broth spooned over it as it baked brought everything together.
It belonged to Thanksgiving, Christmas, and Easter—and to the people gathered around our table.
I’ve been reconstructing it from the way I remember watching it being made: bread broken into pieces, a little water added by feel, a skillet of good things cooking, and a very large bowl to hold it all.
Today, I’m sharing that remembered recipe using Great Value staples from Walmart, along with fresh produce and turkey broth. Perhaps it will find a place at another family’s holiday table, too.
🍎 MAMA & OMA’S GERMAN DRESSING With sausage, apples, raisins & toasted pecans
This is my reconstruction, rather than an exact written recipe handed down. The two loaves of bread and two eggs are as I remember them; the other amounts are starting points to adjust as I bring that familiar flavor back.
INGREDIENTS
• 2 loaves Great Value White Sandwich Bread, 20 ounces each, a day old and torn into pieces • Water, added gradually, just enough to dampen the bread • 1 pound Great Value Pork Sausage Roll, original rather than hot • 1 large yellow onion, diced • 4 celery stalks, diced • 2 medium apples, cored and diced • 1 cup Great Value raisins • 1 cup Great Value chopped pecans • 4 tablespoons Great Value butter, for sautéing • 2 large eggs, beaten • Warm turkey broth, as needed for basting; have about 4 cups available • Great Value cooking spray
If turkey broth isn’t available, Great Value Chicken Broth can be used.
DIRECTIONS
Heat the oven to 350°F. Coat a large roasting pan with cooking spray.
Place the torn bread in a very large bowl. Sprinkle with water a little at a time, tossing and allowing it to soak in, until all the pieces are damp and soft. There should be no standing water.
Brown the sausage in a skillet, breaking it into crumbles. Set aside, draining excess grease.
Melt the butter in the skillet. Sauté the onion and celery until tender. Add the apples and raisins and cook a few minutes longer, until the apples begin to soften.
Toast the pecans in a separate dry skillet over medium-low heat, stirring often, until fragrant.
Add the sausage, vegetables, fruit, and pecans to the bread. Mix thoroughly. Let the mixture cool until just warm, then mix in the two beaten eggs.
Spoon into the prepared roaster. For this reconstructed version, cover and begin checking after 45 minutes. Continue baking until the center reaches 165°F. The total time will depend on the depth of the dressing and the pan.
Check during baking and spoon warm turkey broth over any areas beginning to dry. Add it gradually—the dressing should stay soft and moist without becoming soupy. Uncover toward the end if you prefer a lightly golden top.
Let it rest briefly before serving, then bring it to the table with love.
Some recipes carry more than ingredients. They carry the anticipation of a long car ride, the faces around a holiday table, and the memory of someone who knew just how to make it.
“Recipes feed people for a day, but stories can nourish families for generations.” ❤️